
A typical stimulation/photoactivation procedure in NIS-Elements can look like this:
Connect the Stimulation Device
Add your stimulation devices using the Device Manager. The following items can be used as a stimulation device:
Native Illumination DeviceA physical device such as Nikon A1/C2 or Andor Mosaic III
Optical Configuration, ShutterAny optical configuration or a shutter can be used as a stimulation device. No stimulation ROIs are used in this case.
Choose its Stimulation Path
In the Lightpath Selection table of the Device Manager select the light path with your stimulation device. If it is not listed, use
 Settings... and add the stimulation item from there.
Create a Stimulation Configuration
On the device pad, create a stimulation configuration and save it. In our example, we set the laser power of the DMD device and click
 Add New Stimulation Configuration, and save it as “Preset_1”.
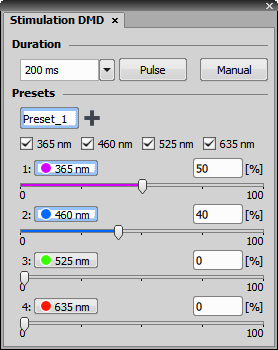
Figure 301. DMD Pad.
Define Stimulation ROI(s)
Open a document acquired by the camera.
Define a ROI(s) with one of the tools - e.g.
 ROI > Simple ROI Editor.
Figure 302. Simple ROI Editor panel.
Note
A ROI does not have to be drawn. You may for example convert a binary layer to ROIs. Please see Introduction to ROIs.
Some devices allows to define a single-point or a line stimulation ROI. You can draw them via
ROI > Simple ROI Editor.
Right-click on the ROI(s) and select Assign to: Device > Name of your Preset. In our example we assign “Preset_1” to ROI number one.
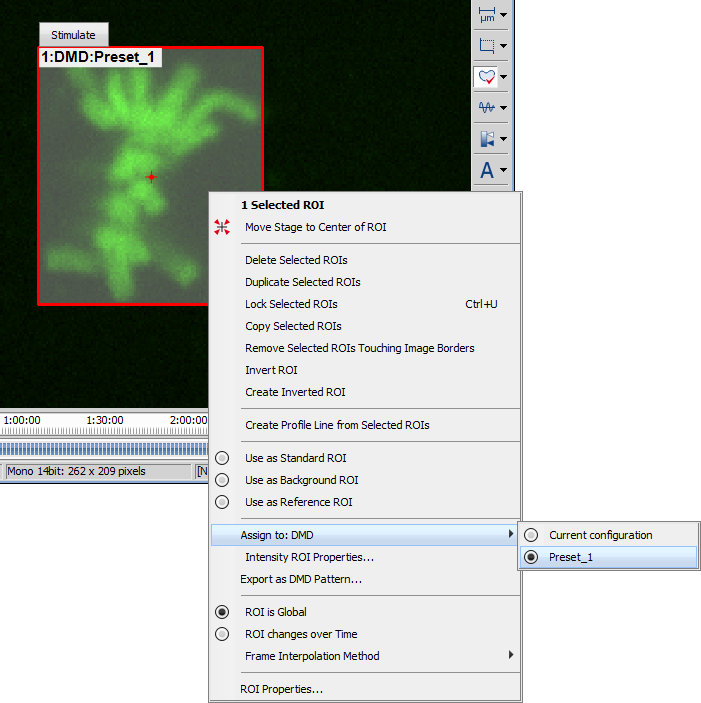
Figure 303. Assigning a Stimulation Preset to a ROI.
Note
Current configuration represents the last used preset available. It is present even if no preset was ever created. It is equal to assigning a ROI directly to the stimulation device but not to a specific laser power.
Stimulation Setup
Display the stimulation setup window. Depending on the type of your experiment, run:
- Applications > 6D > Define/Run Sequential Stimulation - Stimulation (photoactivation) and acquisition are performed in sequence.
- Applications > 6D > Define/Run Parallel Stimulation - Stimulation and parallel camera recording.
- Applications > 6D > Define/Run Simultaneous Stimulation - Simultaneous Stimulation/Bleaching application (obsolete).
Select the correct stimulation configuration using the button.
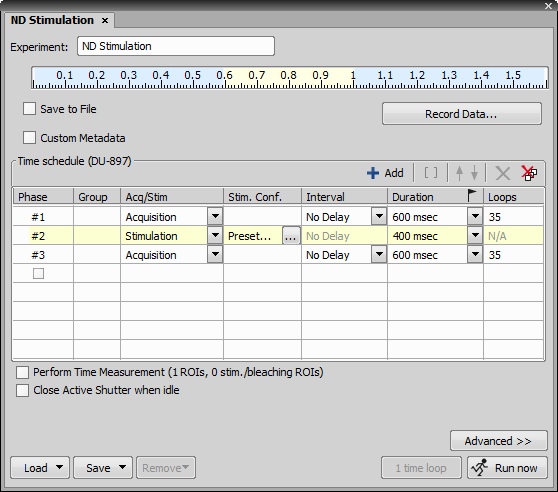
Figure 304. Sequential Stimulation pad.
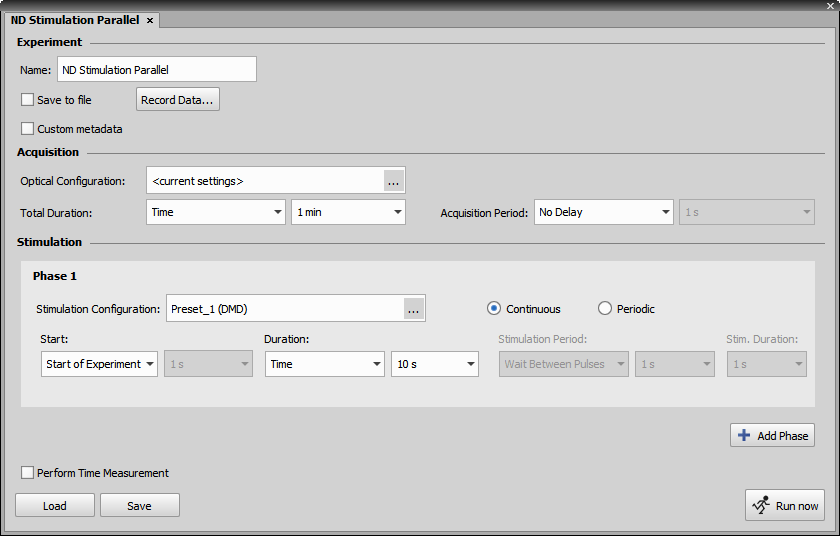
Figure 305. Parallel Stimulation pad.
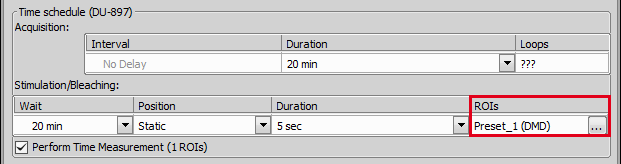
Figure 306. Simultaneous Stimulation pad.
Note
To create more complex stimulations, please consider getting JOBS and HCA with its stimulation tasks.
Review Stimulation Info
Once the experiment is finished, stimulation info can be displayed on several locations:
ND navigation toolbarThe stimulation phase is highlighted in yellow color on the ND navigation toolbar:

Figure 307.
Image Information WindowRun the
File > Image Properties command and go to the Recorded Data tab. Stimulation timing is indicated by the yellow lines. 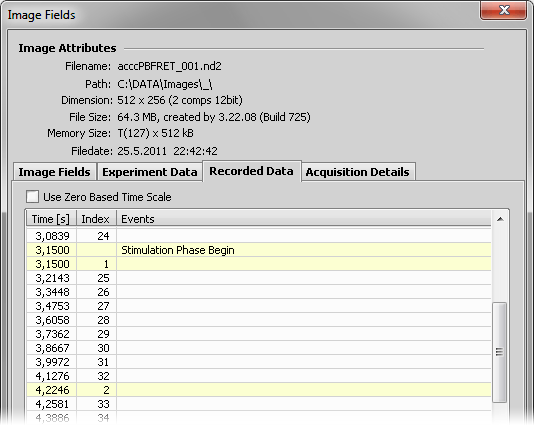
Figure 308.
Time Measurement WindowPerform time measurement (see Time Measurement) on the acquired data set. The stimulation phase is displayed in the graph in yellow.
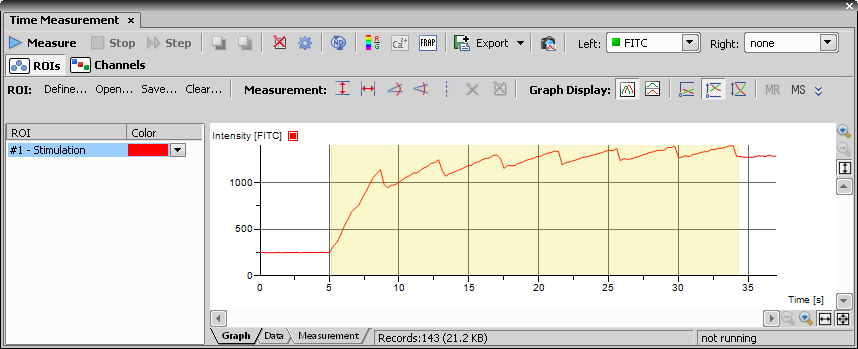
Figure 309.
Or, switch to the data tab where frames used for stimulation are pointed out on the right:
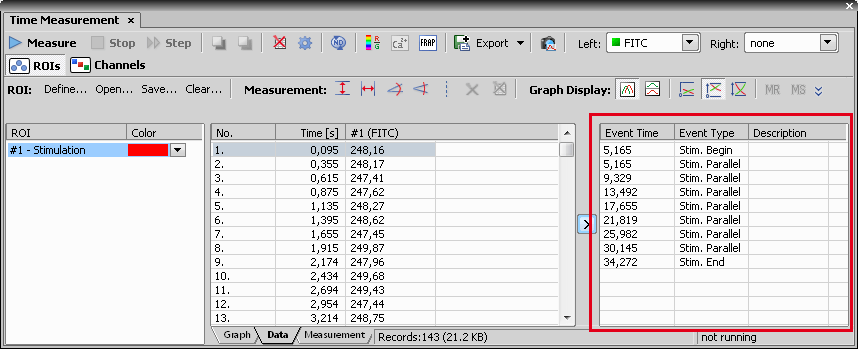
Figure 310.
Analyse the Results
To analyze the experiment results you can use the general measurement tools (Measurement on Graph) or, when you are performing FRAP experiments, you can use the Define FRAP Calibration... tool (Time Measurement Tools).