
The Capturing-to-RAM technique enables user to record sequences displaying very quick actions - lasting tens of milliseconds. Make sure that the RAM Capturing buttons are displayed on the Grabber & Devices ToolBar (see Arranging User Interface), or use commands from the  Acquire > RAM Capture submenu.

Figure 299.
The technique uses a ring buffer to store temporary data. The ring buffer is a part of virtual memory that is being constantly (and repeatedly) filled with the live image data. Depending on how fast the action to be captured is, you should set the ring buffer size (in seconds).
Run the
Acquire > RAM Capture > Settings command. The following window appears: 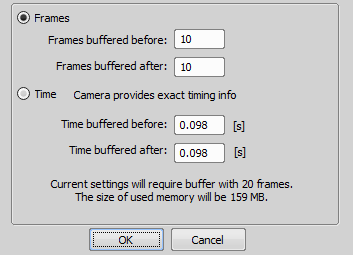
Figure 300.
Set the Frames (Frames buffered before / Frames buffered after. These values represent the time interval before and after you run the
Acquire > RAM Capture > Capture command. Alternatively, you can switch to Time and set the time interval in seconds. Image frames from this time interval will be included in the resulting image sequence.Confirm the settings by clicking .
Turn the Buffer ON
Run the
Acquire > RAM Capture > Circular Buffer ON command to enable buffering of the Live image to RAM.The ring buffer functionality gets activated. The circular buffer button
 (if displayed on the toolbar) indicates the buffer activity.
Capture the Image Sequence
Press the RAM Capture
 button or run the Acquire > RAM Capture > Capture command.
A new image window containing the captured image sequence opens.