
Apart from the main application layout used for capturing and image analysis, NIS-Elements provides an extra layout called  Organizer. Organizer makes the work with image files and databases as easy as possible. To activate it, run the
  View > Organizer Layout
  command or click the
  button located in the top right corner of the application window. The screen opens divided into two identical panes. To switch from one pane to the other, use the F6 key. To copy files between the panes, simply drag the images from one side to the other side.
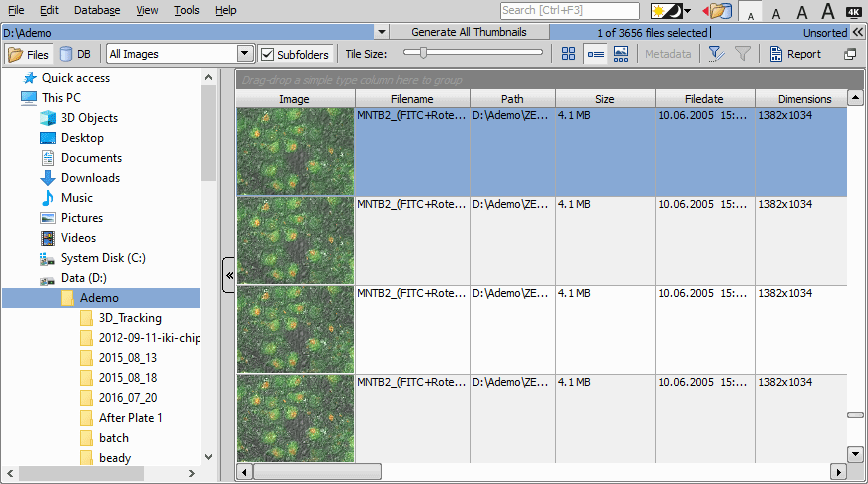
Figure 370. Organizer layout
To navigate to a folder containing your image files, use the tree view on the left or enter a path into the first blue edit box. The drop-down menu next to it (
 ) reveals a list of recently used folders.
calculates image thumbnails for all images present in the current folder.
The next pull-down menu sets the file type. Only images with the selected type will be displayed or All Images can be shown.
If the Subfolders check box is selected, all images from the included sub-folders are displayed.
You can define a filter which enables you to display only images which fit the defined conditions. One or two conditions may be applied.
 Pressing this button invokes the filter setup window.
 This button activates the filter.
Basic Mode
This mode enables you to filter files according to one condition.
Advanced Mode
This mode enables you to define two conditions with a relationship between them. Either select OR to display files matching at least one condition, or select AND to display files which match both conditions.

Figure 371.
Search in field - select the field where NIS-Elements should search for a given expression.
If the selected field is of a numerical type (e.g. Size, Calibration, File date, etc.) you can specify, whether you want to find the exact value or a value in a given range. This is selected by the Condition type radio button.
If the field type is Text, the Occurrence setting determines the way of evaluating the expression:
Anywhere - If the given sequence of characters is found anywhere in the field, the system will evaluate it as a match. For example: you have entered “set” to the Values field. The filter will select records with the following field values: “set”, “reset”, “settings”, “preset”, etc.
Exact - If the given sequence of characters exactly equals to the content of the field, it is evaluated as a match. Fields containing the “set” value only will match.
Start - If the entered string is found at the beginning of a field, it passes the condition. For example: fields containing “set”, “settings”, “setup” will match.
All letter strings - It is possible to search for more expressions. These should be entered separated by commas. If you want to enter an expression with a space, insert it quoted. If this option is selected, only records where all of those expressions appear (anywhere) will match.
Any letter string - This option is for entering multiple expressions as above, but this time every field with an occurrence of at least one from the given expressions is matched.
To open an image double click its thumbnail. NIS-Elements will close Organizer and display it in the main window.
To select multiple images, either click on the first and the last image holding the Shift key (continuous group selection) or click individual images with the Ctrl key down.
You can copy one or more images from one folder to another by “drag and drop”.
To delete selected images press the Delete key.
All these operations and some other can be invoked also from the context menu, which appears after you right-click on the image thumbnail:
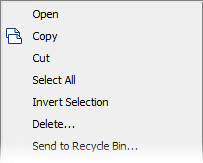
Figure 372.
Thumbnail Displaying Options
You can adjust the way images are shown in the organizer.
 Show thumbnails
 Click this button to display image thumbnails and use the Tile Size slider to adjust their size.
 Show image details
 This mode displays images below each other with all available information aside.
 Show film strip
 Images are shown as a film strip below the currently selected image which is displayed big.
Displays a metadata summary list related to the selected image. This mode is disabled for the image details view.
Sorting of Images
To order displayed images, right click anywhere in the pane - a context menu will appear. Move to the Sort by sub-menu which offers several ordering criteria. If the ordering is turned ON already, the icon is displayed on the left side of the applied criterion.
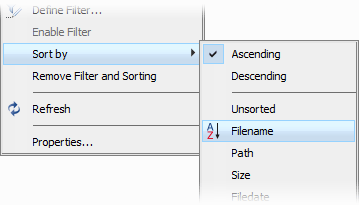
Figure 373.
Grouping of Images
To arrange the view of images efficiently, you can use the capability of grouping of images. Drag the column caption to the grouping bar right above the table. All files with matching field values of the selected column will be grouped together. This can be undone by dragging the column caption back to the others.
Note
If you have the Database module installed, the Organizer becomes switchable between two modes: the  Files view and the
  Database view. See description of the Database View.
The pane size is adjustable. To resize it, you can either:
Place the mouse cursor over the dividing line in the middle.
The cursor becomes an arrow with two tips.
Drag it left or right to the new position.
Click the
 icon which resizes the panes to achieve the same size for both of them.
Click the

 buttons which hides one pane and displays the other on the whole screen.
To change the size of the whole organizer window and restore it down, click  Restore Organizer (F10).
Images together with their metadata can be exported into a report. Selecting image(s) and clicking on  Report opens the Create Report from File Listing dialog.
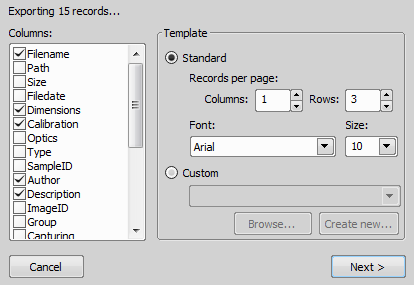
Figure 374.
Here you can select which columns will be transferred to the report and which template is used. Click to generate the template and then adjust it according to your needs. For more information about reports, please see Creating Reports.
(requires: Local Option)
Image files created by NIS-Elements with metadata also contain predefined tags (labels describing image type or acquisition method used). These tags are shown inside the Organizer as well as in Windows Explorer.
In Organizer, tags assigned to an image are shown directly in the image thumbnail and in the image preview in the form of color arrows.
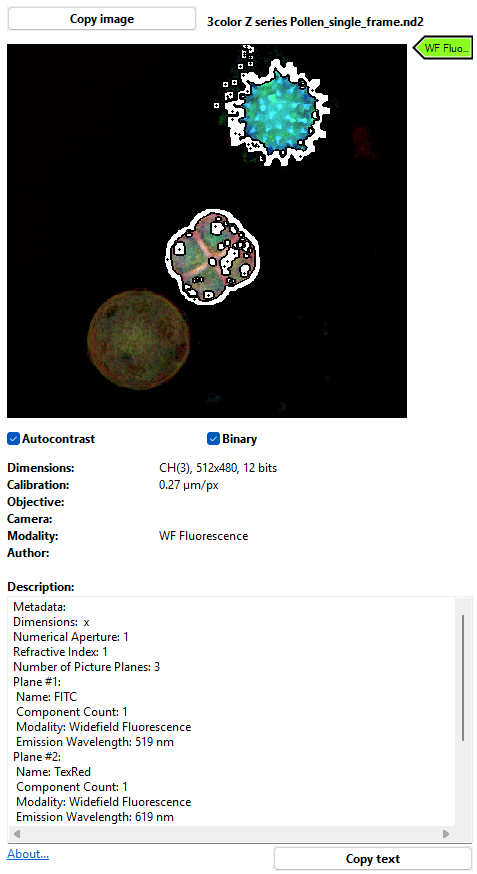
Figure 375. A sample image with one tag and options to enable or disable Autocontrast and the Binary layer.
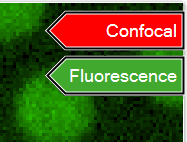
Figure 376. A sample image with two tags.
Note
With NIS-Elements installation, a “shell extension” for displaying tags is added to Windows Explorer automatically. On computers not running NIS-Elements this shell extension has to be installed manually. A separate setup is available for distributors at https://www.lim.cz/dzone.
Tags are very useful for filtering a large amount of images. To filter images in Organizer, simply click on the  Define Tag Filter button, select a tag in the left column and click . The
  Enable Tag Filter button is automatically turned on and only images with the selected tag are shown. To select a combination of tags, select another tag in the right column and set the condition in between them. The logical operator means that only images having both the left and the right tag are shown. means that only images having one of the selected tags (or both) are shown.
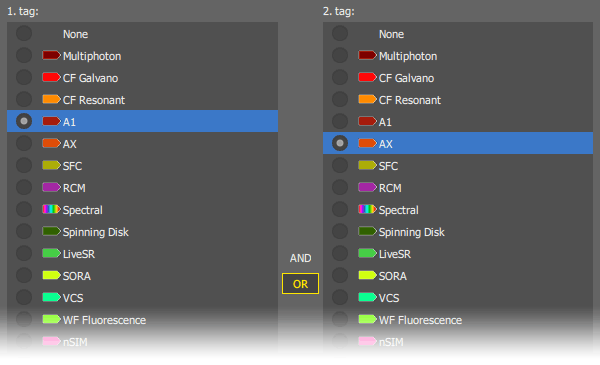
Figure 377. Image Tags Filtering Definition in NIS-Elements Organizer.
To turn off the filter and show all images in the folder, click Disable Tag Filter. To show or hide the tags in the image use the  Show Image Tags button.
Windows Explorer
To view the tags, select View > Preview pane.
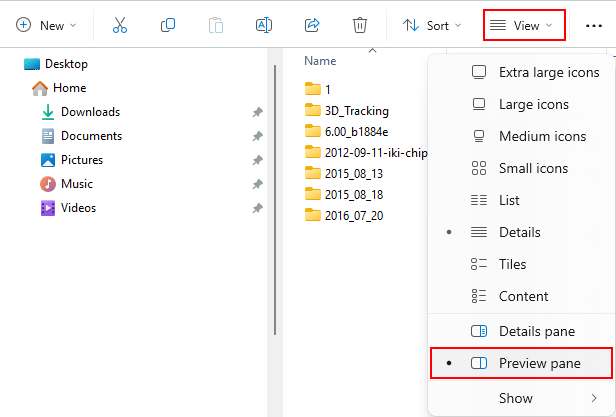
Figure 378. Windows Explorer settings.
To filter the images in Windows Explorer, use the search field on the right.

Figure 379. Windows Explorer Search Field.
Type in for example:
To find images with the BRF tag.
To find images with both BRF and TD tags.
To find image having one of the tags. In case of a multi-word tag, the phrase has to be in quotes.
Note
The “tags:” search instruction corresponds to the header Tags. If you are using a Windows language other than English, use the local equivalent for “tags”.
Another way is to click on the arrow next to the Tags header and check the tag(s) to be filtered out.
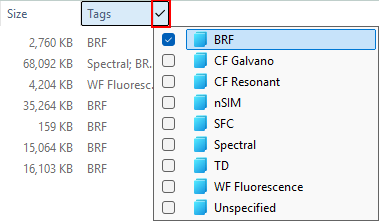
Figure 380.
Preview image together with the tags, metadata and description is shown in the right pane. All image files can also be sorted by tags using the View > Sort by > Tags option or simply by clicking on the Tags column header.
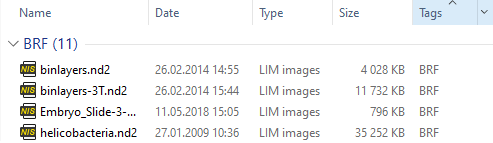
Figure 381. Sorting images by the “Tags” column