
Caution
You have to possess the administrator rights to your computer to be able to install NIS-Elements successfully.
Quick Guide
Launch the setup file and follow the installation wizard.
Select your NIS-Elements software version, additional modules and device drivers.
Plug the provided HASP key into the USB port of your PC.
Run NIS-Elements.
Run the setup file
After you run the setup file, an informative window appears. Start the wizard by clicking the button.
Accept the license agreement
Scroll down the license agreement page, select I accept the agreement and click .
Select software packages and installation folder
NIS-Elements AR, NIS-Elements BRSelect the software package to be installed. Select the one you have got the license for and which is properly coded in your HASP key.
Analysis ShortcutIf you select the 'Analysis Shortcut' option, an additional desktop shortcut will be created. It can be used to run NIS-Elements for analysis purposes, without connecting to any camera or other devices.
Local OptionSelect whether to install Local Option or not. The Local Option installation provides some advanced features which did not pass the quality assurance procedure yet. We recommend to wait until they are released officially.

Figure 1. Local Option installation
Define the folder where NIS-Elements should be installed. We recommend to use the predefined directory. Click Next.
Select cameras
Now, select the cameras which will be used with NIS-Elements.
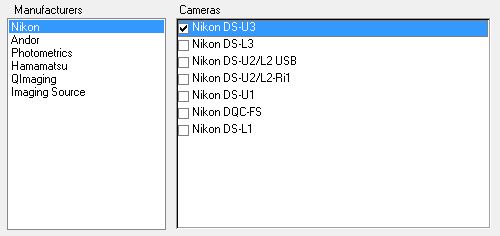
Figure 2.
Note
When a camera is installed, CPU Power Management C-State is automatically disabled to secure stable camera operation. Please restart your computer after changing the C-State settings. C-state is automatically restored to its original condition after uninstalling NIS-Elements.
Please see HP Z440/Z840 Power Management for more information about C-State.
Select modules
If your license contains some additional modules besides the NIS-Elements core software, please select them in this window. Click Next.
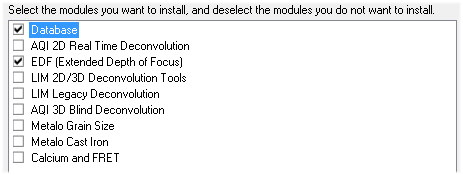
Figure 3.
Note
Any module selected will be installed along with NIS-Elements automatically. However, you might not be licensed to use it. The module will run after you get the corresponding code registered in your HASP key.
Select devices
Select the devices which will be used with NIS-Elements. Click Next.
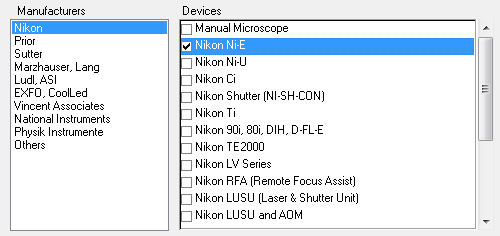
Figure 4.
Note
NIS-Elements may not be connected to devices after installation depending on the PC status at installation. If so, execute the Modify installation command of the Windows Start menu (see the next step) to perform Repair that corrects the previously installed status.
Start the installation
Start copying the files by clicking the Install button.
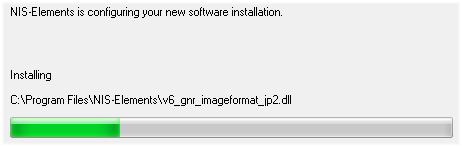
Figure 5.
The setup creates a new program group in the Start menu containing the following shortcuts. They will be accessible to all user profiles on your local Windows operating system.
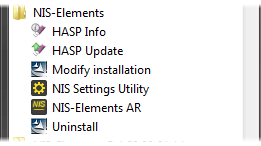
Figure 6. Start menu
License ManagerThis utility displays information about the license modules coded in your license key and activates or updates your key when new licenses have been purchased. Please see License Manager.
Modify NIS-ElementsModifies the installation, adds hardware drivers, modules, etc.
Note
The setup file must be accessible in its original location for this shortcut to work. Or, you can run the setup file of the same software version placed anywhere. In such a case, the installed software will be recognized automatically and the Modify option will be offered.
NIS-Elements ARShortcut to run the software. A shortcut to NIS-Elements is created on the desktop too.
Uninstall NIS-ElementsRuns the uninstallation procedure. It deletes all installed files from the disk, and removes the NIS-Elements program group from the Start menu as well as it removes the desktop icon.
Define the temp folder
You can change the location of the temporary folder. Do this if there could be issues with the amount of free space on the C:\ drive.
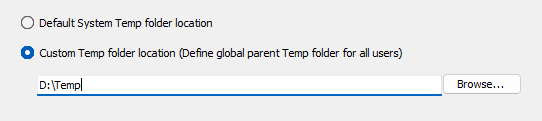
Figure 7.
Click Next.
Close the wizard
Finish the installation by clicking the Finish button.
Since version 7.00.00 NIS-Elements has to be activated before use. The activation can be done in three different ways:
Activation after first NIS-Elements start (on-line connection required)
Run NIS-Elements. The following notice is shown, click .
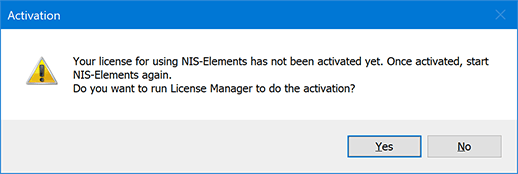
Figure 8.
Make sure the HASP key is plugged into the USB port of your PC and click .
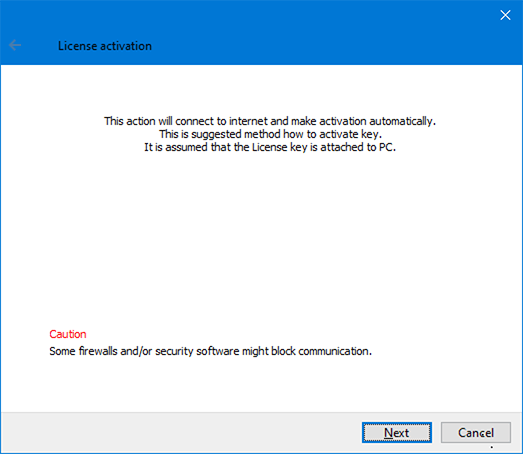
Figure 9.
Information about the version which will be activated is shown. Click .
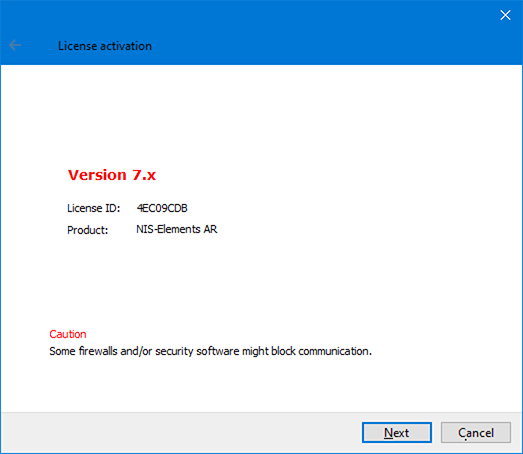
Figure 10.
NIS-Elements is activated. Click . NIS-Elements will start automatically.
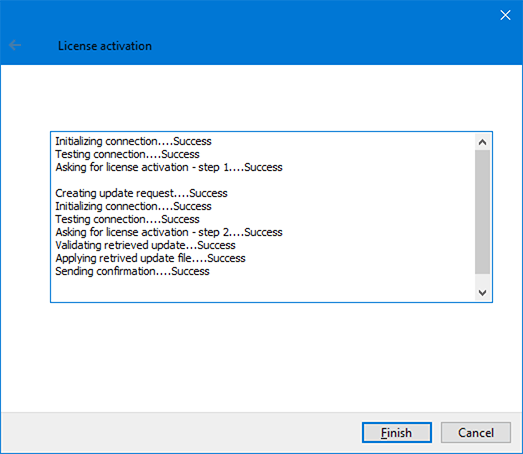
Figure 11.
Activation from the License manager (on-line connection required)
Browse to the installed NIS-Elements in the Start menu of Microsoft Windows and click on the License manager (License Manager).
Follow the steps described in the previous procedure (Activation after first NIS-Elements start (on-line connection required)).
Activation from the License manager (off-line)
On the computer station with the connected HASP key, start the License manager (License Manager) and generate a request file using the button.
Take this file to the on-line computer station (e.g. on a flash drive).
Open the https://license.laboratory-imaging.com/nisactivation web page.
Click on + and upload the request file.
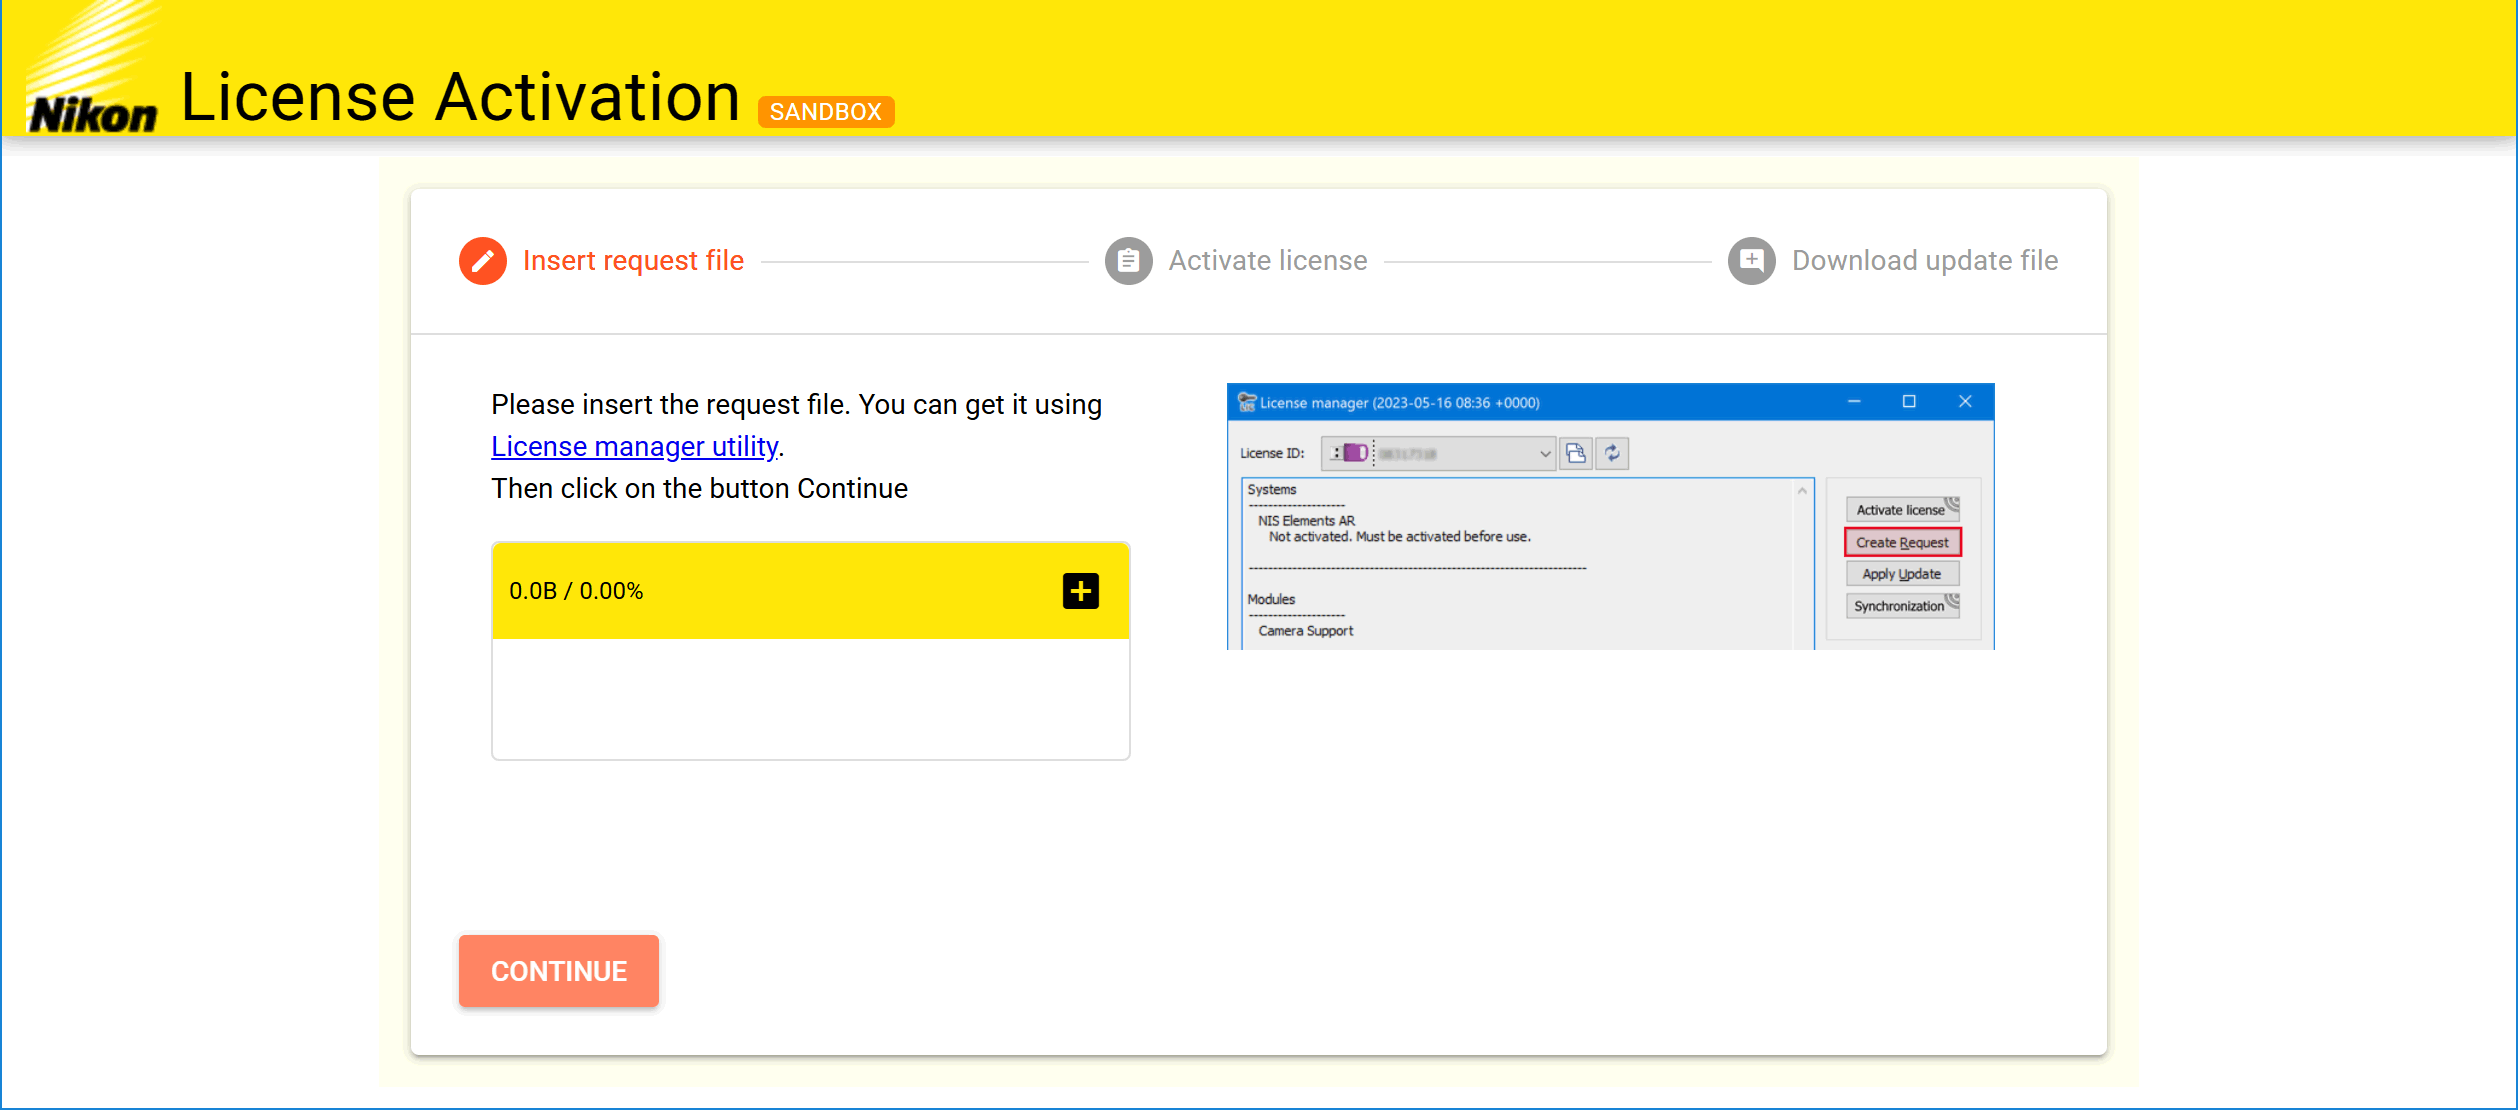
Figure 12.
Once the file is uploaded, click CONTINUE.

Figure 13.
Information about the version which will be activated is shown. Click ACTIVATE.
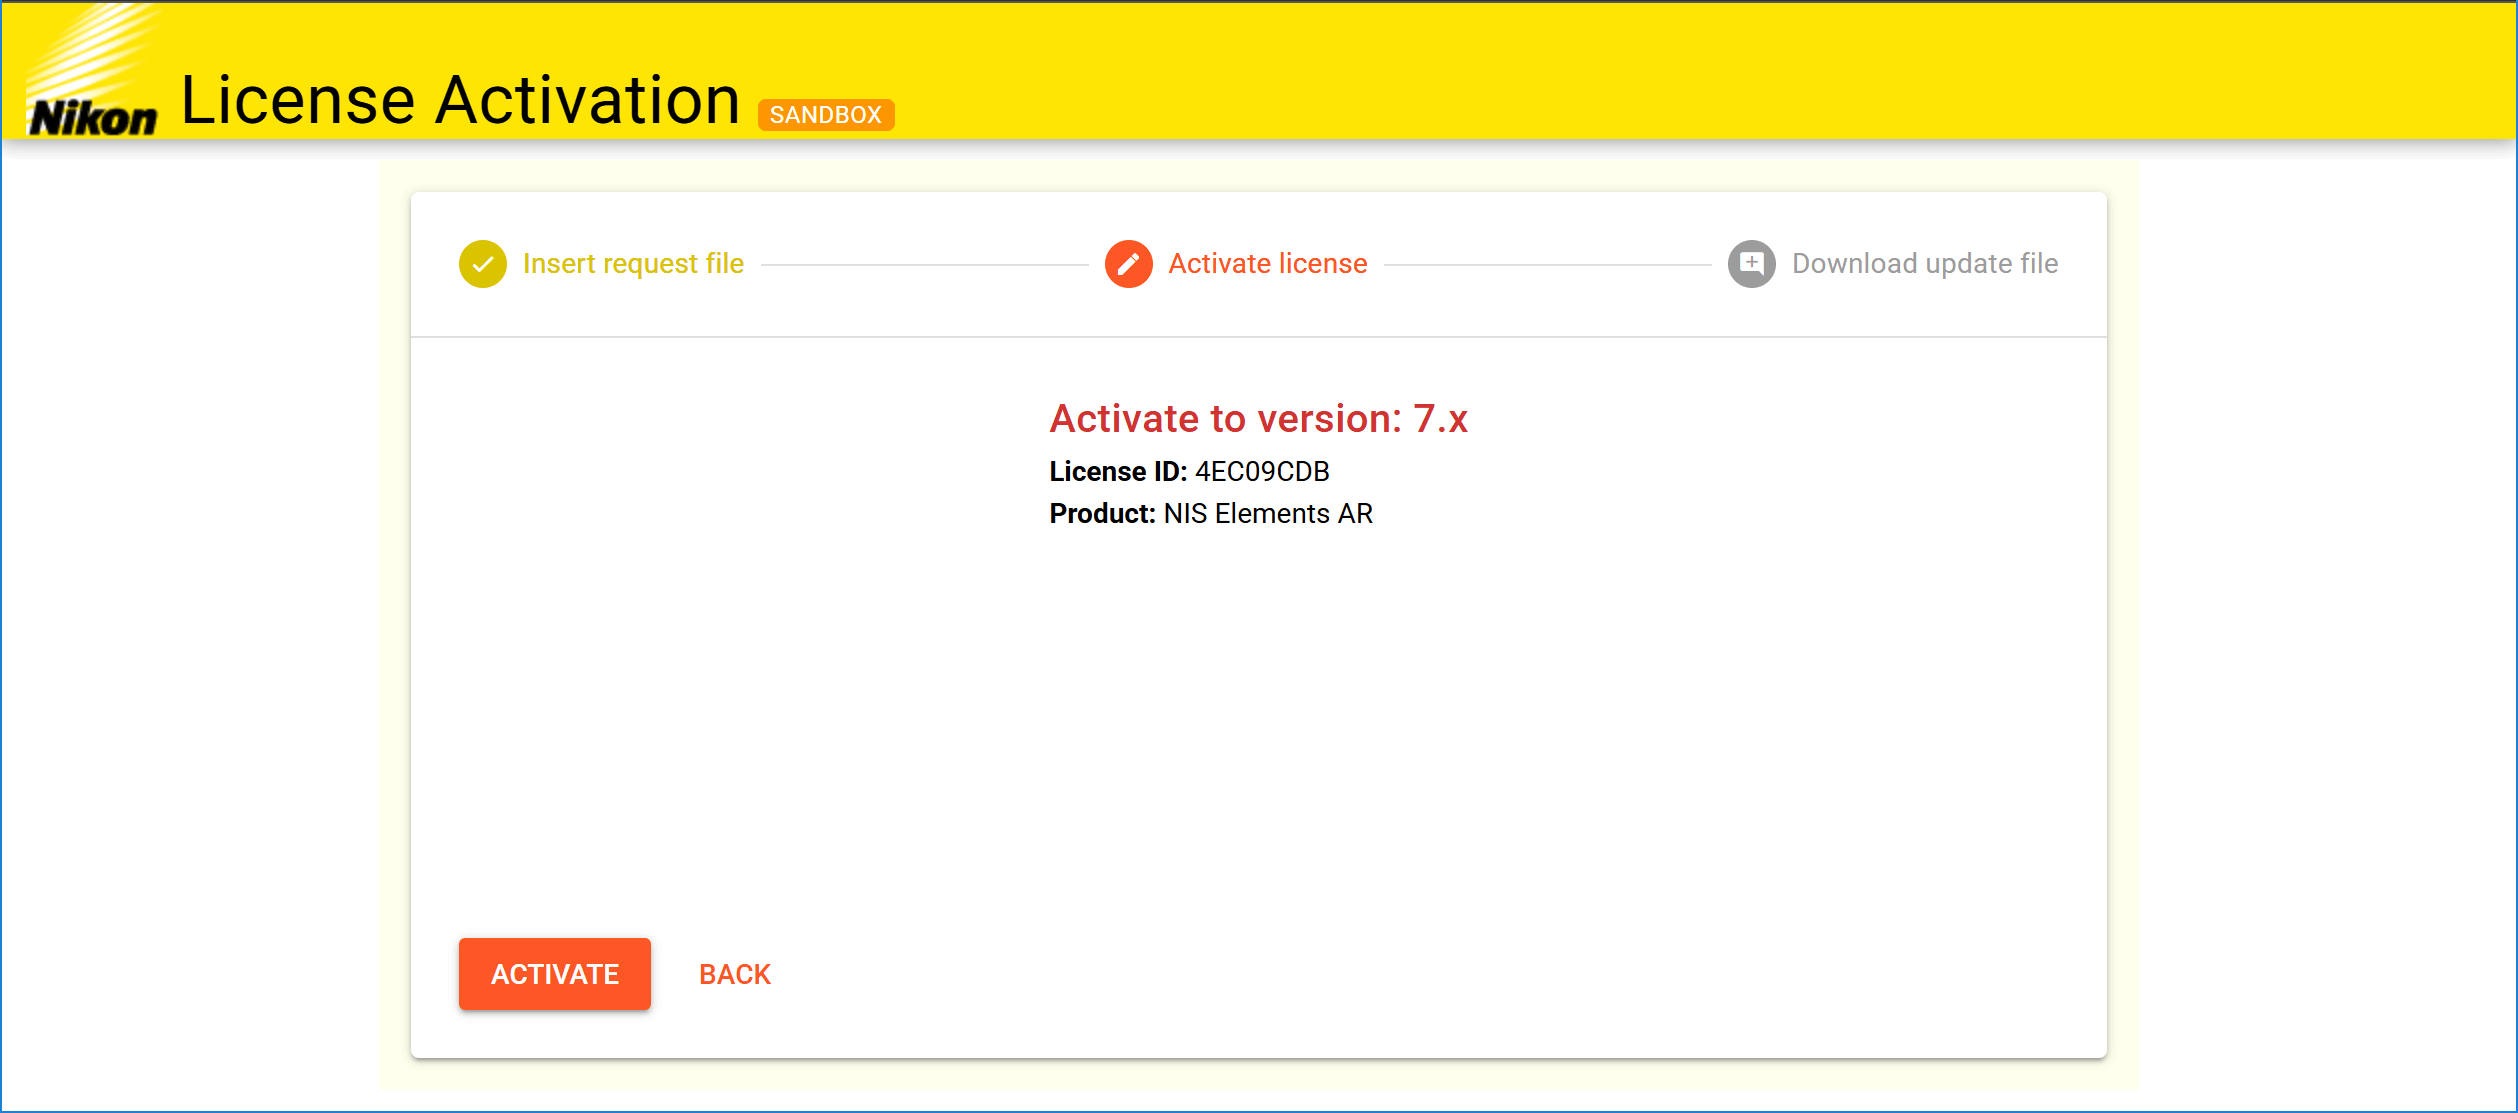
Figure 14.
Download the update file (e.g. on a flash drive).
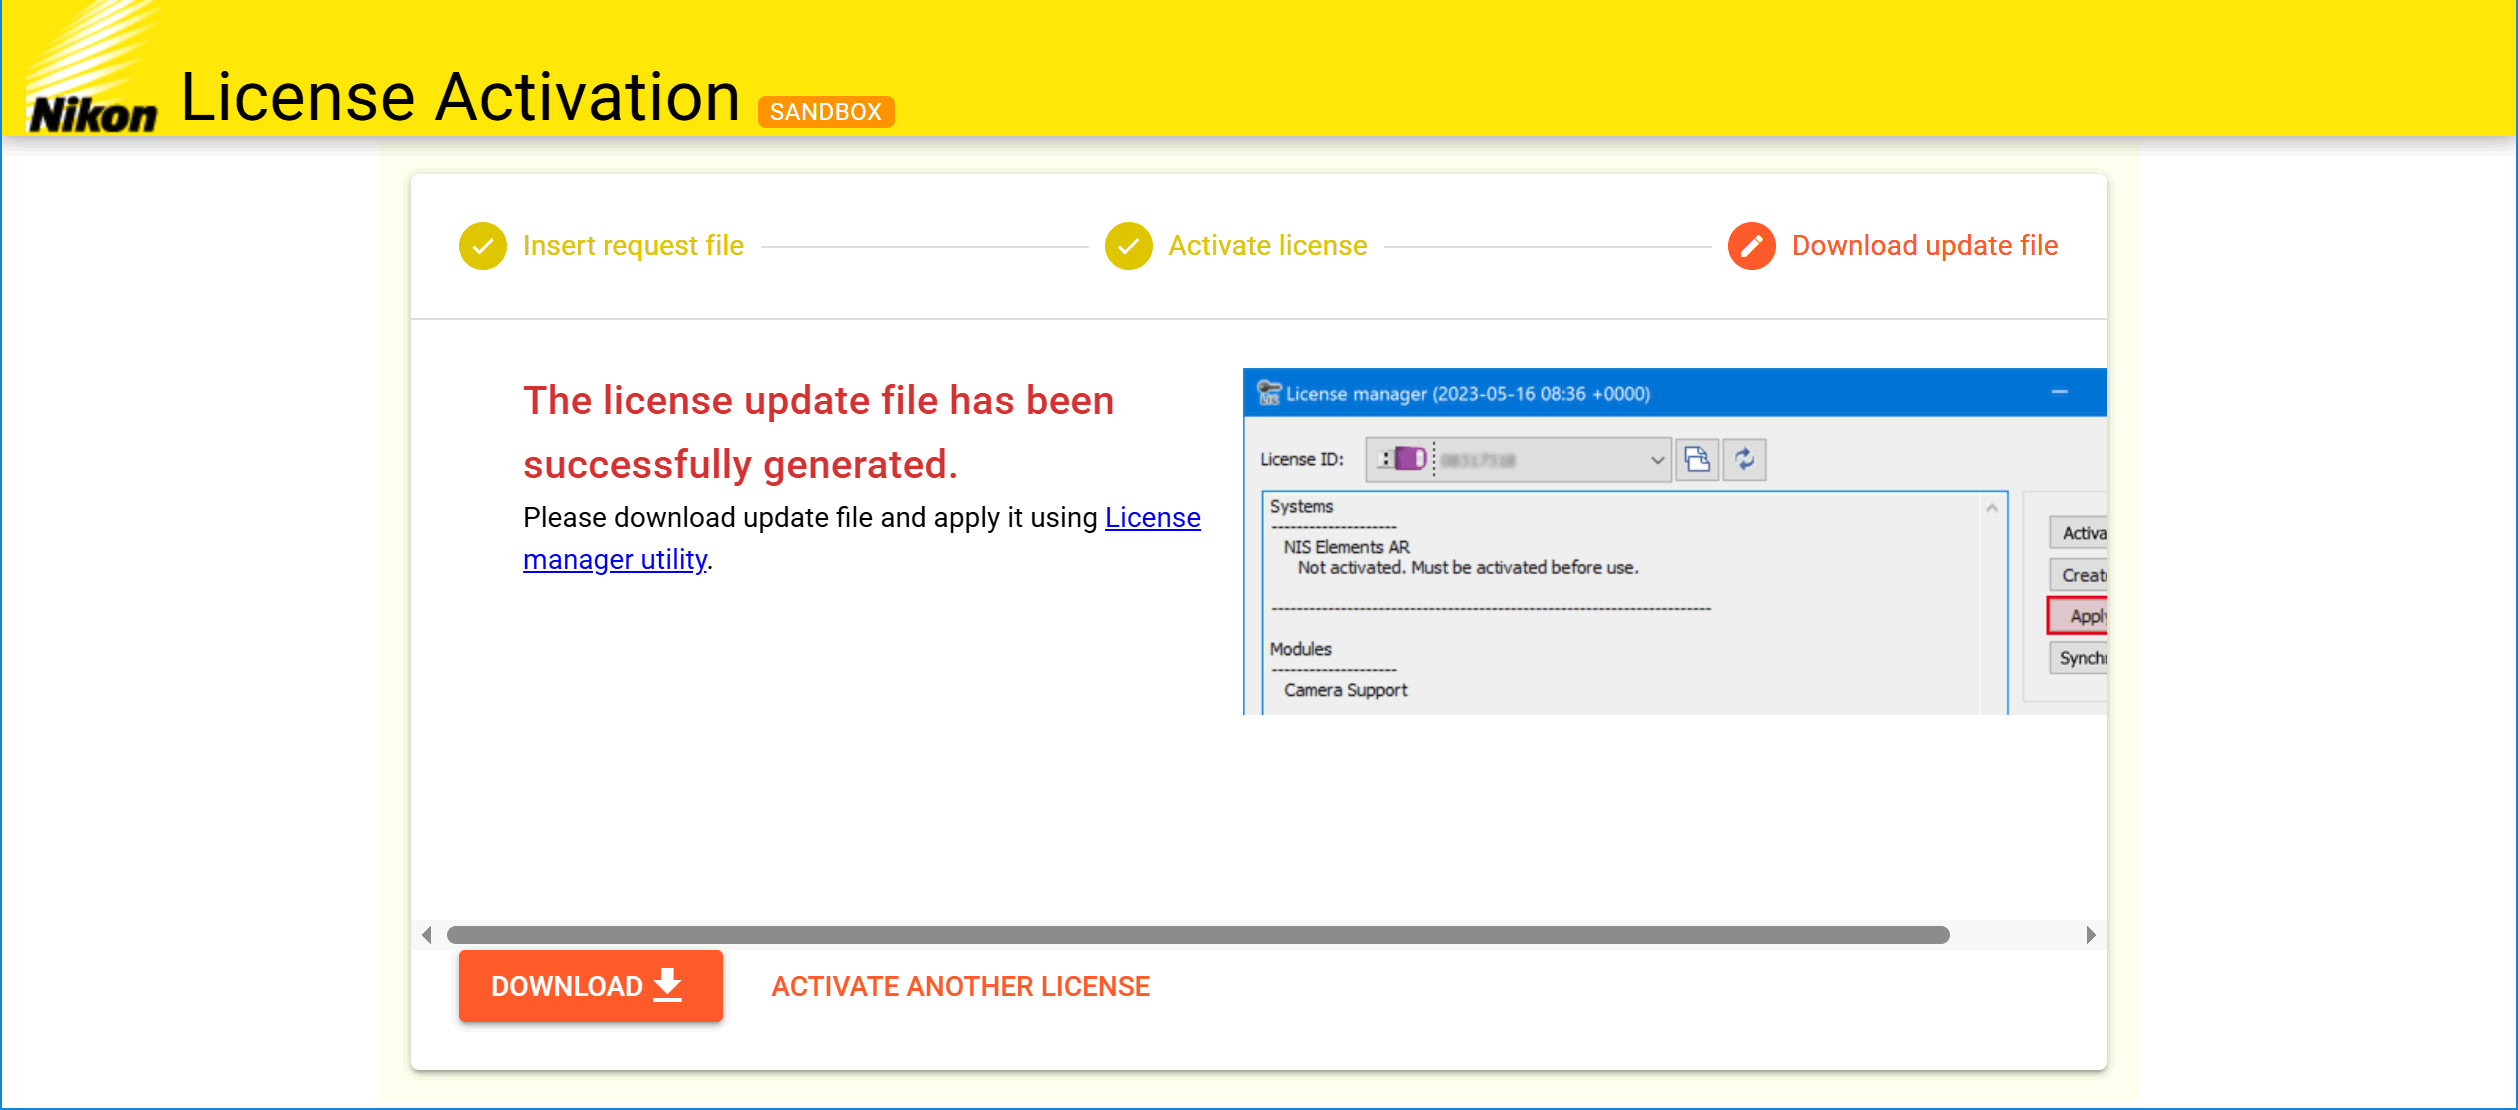
Figure 15.
Take the update file to the computer station with the connected HASP key.
In the License manager, click , browse to the update file and click Open.
NIS-Elements is activated.
The License manager utility is installed together with NIS-Elements typically into the following location:
C:\Program Files\NIS-Elements\HASP\licmgr.exe
It can be opened using the License manager shortcut in the Start menu of Microsoft Windows.
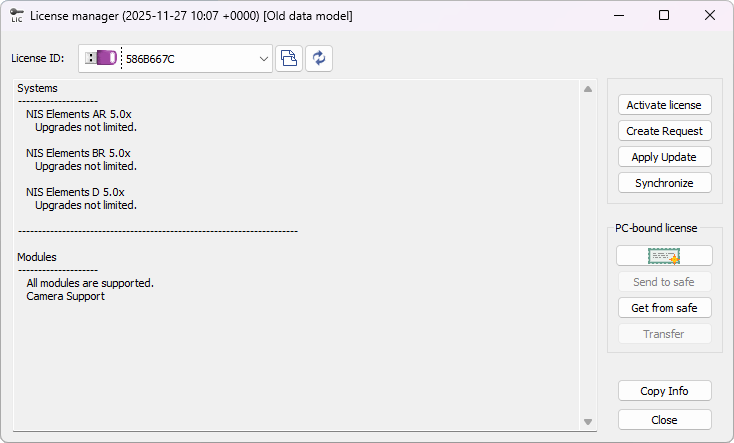
Figure 16. License manager dialog window.
Drop-down menu used for selecting the HASP key if there are multiple keys.

Copy the HASP key ID into clipboard.
 Refresh list of license keys
 Refreshes the list of license keys.
Hardware keys (NIS-Elements management)
Performs the NIS-Elements activation ( NIS-Elements Activation).
Creates a request file used for off-line activation (Activation from the License manager (off-line)).
Applies the update file during the off-line activation (Activation from the License manager (off-line)).
This is a function that synchronizes the contents of the HASP key with the contents of the license database (from the database to the key).
PC-bound license (NIS-L management)

Activates the license on the computer.
Performs sending to the safe (for transferring between computers).
Moves from the safe (for transferring between computers).
Starts the off-line transfer.
Copies the HASP information to clipboard.
Closes this dialog window.
Tip
Right-click on the window header to switch to the old HASP coding format (Use old data model).
See Command Line Startup Options for details about how to use command line switches. The following switches are to be used with the NIS-Elements installation file to modify behavior of the installation wizard.
This parameter unhides options in the setup which are hidden by default. It concerns mainly drivers of devices which were formerly supported but are no longer available.
If this command line parameter is appended, the setup checks if any other setup has already been installed. If so, the setup restarts and runs in an independent mode. The update mode is disabled. This enables the user to install two or more builds together on one operating system.
You may need to install a device or an additional module after the NIS-Elements main system installation.
Go to [Start menu > Programs > NIS-Elements] program group.
Select the Modify Installation command.
Follow the installation wizard instructions. Select the check-boxes by the items you would like to add.
Finish the installation.
If you chose to install the Sample Database, a new subdirectory “Databases” is created inside the NIS-Elements installation directory (e.g. C:\Program files\NIS-Elements \Databases\...). The “Sample_Database.mdb” file is copied to there along with database images (stored in subdirectories). An administrator username/password to access this database is set to:
Username: “sa”
Password: “sa”
NIS-Elements is delivered with a hardware key (also called HL = hardware license or HASP).

Figure 17. Hardware key
The key contains information about the software license and allows users to run the corresponding software. A warning message is displayed when user starts NIS-Elements with an incorrect hardware key. Please do not connect the USB hardware key until after the software installation is finished. The utility called License manager is installed to the installation directory. It enables the user to view information about the software license. See also Hardware licenses.
The main goal of the Device Updates setup is to add new devices/cameras or to fix problems that are localized in the drivers only and do not affect any other NIS-Elements functionality.
Device Update setup requires installation of the corresponding NIS-Elements version. The setup contains only .dll files supporting a new device or some corrections and upgrades of already existing drivers. This update form keeps NIS-Elements stable and the update file size small.
Device Update numbering is consecutive and appropriate to its NIS-Elements version until a new full setup of NIS-Elements is released (Major version, Service Pack or HotFix) - then the numbering starts from the beginning.
Device Updates are cumulative and contain all the changes from the previous updates. Also full NIS-Elements setups (Major versions, Service Packs and HotFixes) will contain all the changes from the previously released Device Updates.
Fixes represent driver changes which serve for testing purposes or for correcting problems occurring only under special conditions. Fixes are packed into a zip file containing modified driver files. Fixes are usually user requested, therefore they are not considered as Device Update candidates.