This use case shows how to use images captured inside one well for correcting images in all the other wells.
To perform a simple wellplate experiment with a single well selection (named “Shading”), define some random points inside the well and capture the images. Save the job under a name, for example “testSimpleReferenceND”.
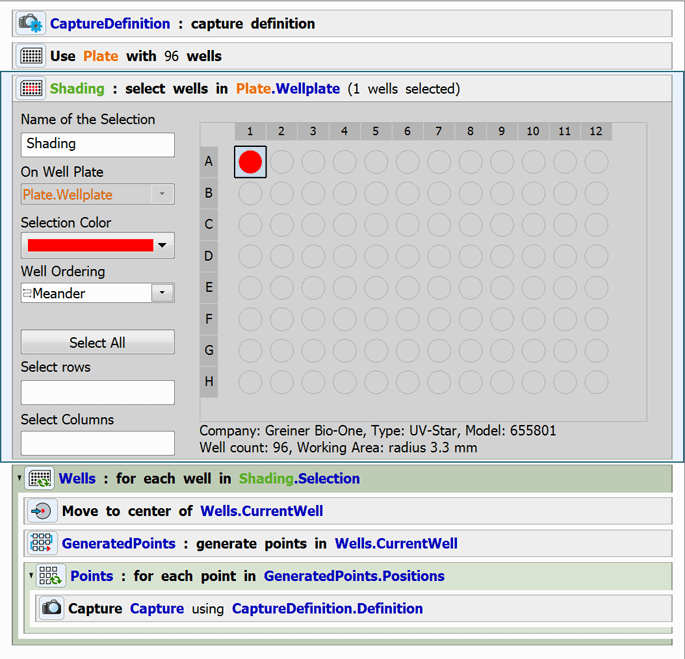
Figure 728.
Run the experiment, open the file and prepare the following GA3 on it. Using Min IP over many images makes sense in order to get only the background. Save the resulting image into a single TIFF file (Results > Export Single Tiffs) for later use in JOBs. Select Do not store this result in the context menu on the second “All” node. Save the GA3 with a meaningful name, e.g. “justSaveMinIP”.
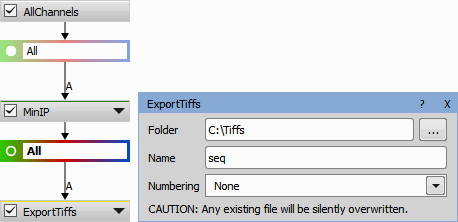
Figure 729.
Open the “testSimpleReferenceND” job for editing again. Change the Acquisition >
 Capture task to save Never or later. Insert the GA3 Processing >
  General Analysis 3 task and make sure “justSaveMinIP” is selected.
Note
By default the last GA3 is always selected.
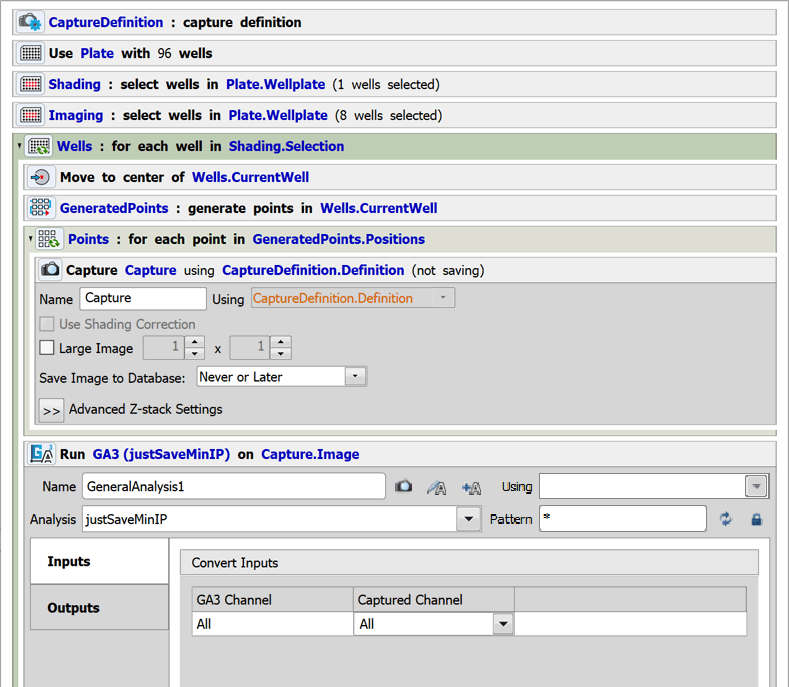
Figure 730.
Run (and save) the experiment. The job will notify that it did not save any data. That is correct because the file was exported into the user home folder. Drop it (
c:\Users\me\seq.tif) into NIS-Elements and setup the second GA3.Import the reference file
seq.tif(by the Color Image node) and subtract it from the mono on the input (currently the same data). Clip (to get rid of the negative values) and Change Bit Depth of the image into 16-bit (or as necessary). Save the GA3 as “currentMinusRef” and close all images.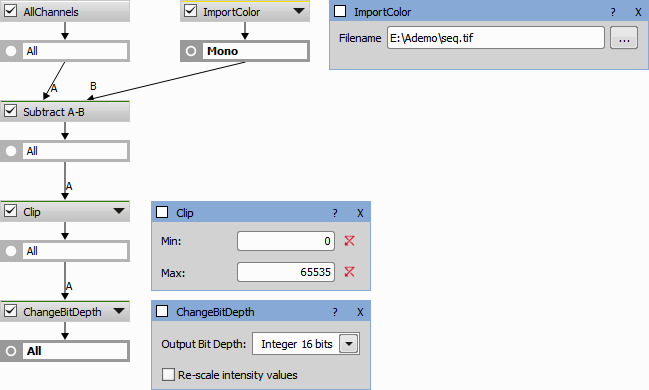
Figure 731.
Open the “testSimpleReferenceND” job for editing again. Insert the second well selection, name it “Imaging”. Add the second Well Plates >
 Loop over Wells task used over imaging wells (wells without the one used for shading) and other loops if needed. Insert a new Acquisition > Capture and GA3 Processing > General Analysis 3 inside the loops. Remember to select the second Acquisition > Capture inside the second analysis. Select the “currentMinusRef” inside the GA3.
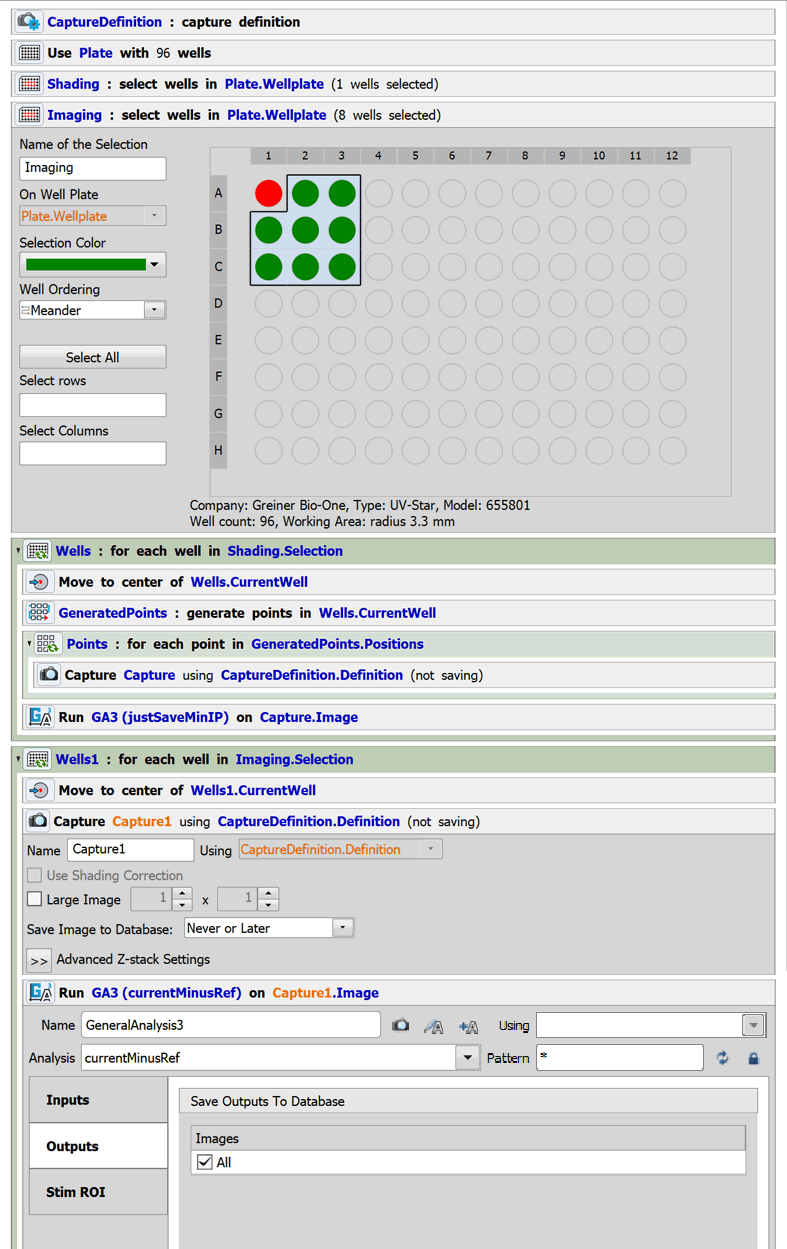
Figure 732.
Run the analysis and inspect the difference between the captured image and the one coming from the subtraction.
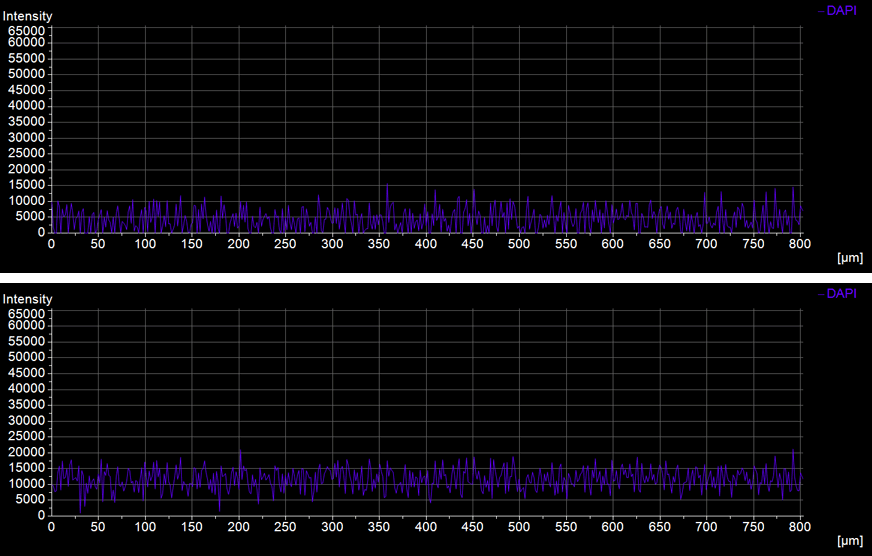
Figure 733.
Open the “testSimpleReferenceND” job to be edited for the last time. Change the second Capture1 task to save Never or later. Now the job is ready.