
 Scan Large Image
 Task enabling to scan large images using precise parameters. When a cell is bigger than the field of view of your objective, scan it using this task to create a large image. | Requires: Module: |
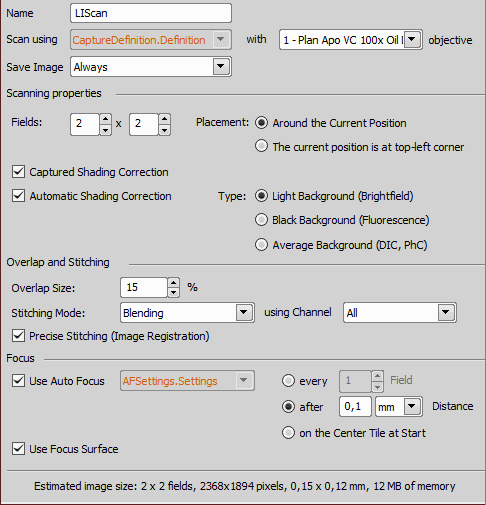
Figure 1239.
Select a Acquisition >  Capture Definition and specify its objective from the combo box (with ... objective).
Around the Current Position places the corners of the fields directly next to the current stage position. The current position is at top-left corner uses the stage position as a position of the top-left field.
(requires: JOBS) (requires: Local Option)
This function corrects geometrical image distortion to eliminate duplicated structures in overlapping image tiles. It is closely described in Distortion Correction.ai.
Shading correction saved with the Optical Configuration can be used. Select your Optical configuration and then go to Acquire > Shading Correction Panel to capture the shading correction. Then you can check the Captured Shading Correction check box.
To perform the shading correction automatically without capturing the shading image, check this option and choose the type of correction which best represents the background of your sample image.
This area contains parameters defining the overlap size, stitching mode (blending or optimal path) and a channel which is used for the stitching. Precise stitching (Image Registration) can be checked but be aware that it is more computationally demanding.
Autofocus can be used checking this function. Select a Autofocus + Focus Surface >  Autofocus Settings and choose where in the large image it will be performed (every n-th Field, after a specified stage distance or on the Center Tile at Start). Autofocusing on frames without the sample can be skipped (Skip frames without sample).
Focuses using the surface defined in the Focus Surface tab of the  View > Acquisition Controls > XYZ Overview
  panel.
 Scan Large Image in Slide/Well/Area
 This task scans large images on a sample holder (slide, stage area or well). Create a well plate experiment and decide on which wells a large image will be captured. | Requires: Task: Acquisition > Module: |
 Define Slide
 Define Stage Area
 Loop over Wells
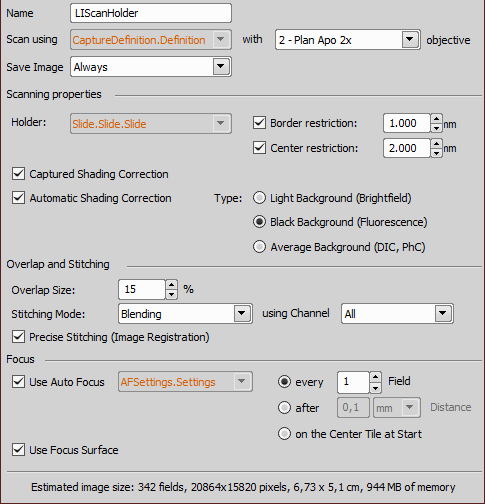
Figure 1240.
Please see Large Images > Scan Large Image describing other parameters which are similar to this task.
 Scan Large Image in Region
 This task is used to scan large images on a predefined set of regions. Regions can be generated automatically using Analysis > | Requires: Module: |
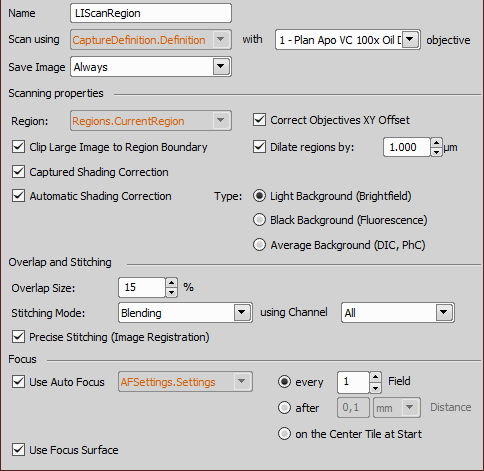
Figure 1241.
Large Images >  Loop over Regions in which this task is placed.
This feature corrects the XY offset previously set in Devices > Objectives XY Offset Setup.
Please see Large Images > Scan Large Image describing other parameters which are similar to this task.
 Scan Large Image by Continuous Movement
 This task quickly scans any selected area on the stage or the whole stage. Use this task for a slide preview with a low magnification objective. | Requires: Device: Motorized Stage |
If the current speed of the XY stage is reduced for some reason (e.g. by the Stage XY Points >  Set XY Speed/Accuracy task), it will be used.
Use the maximum speed available to achieve the expected result.
To perform the shading correction automatically without capturing the shading image, check this option.
Focuses using the surface defined in the Focus Surface tab of the View > Acquisition Controls > XYZ Overview panel.
Click this button to reveal advanced options.
Set the amount of blur and noise reduction.
Runs a precise image-registration function to compensate mis-alignment of images. The transitions between tiles of the large image will look better but the processing will take longer. If your system is properly aligned, this function should not be needed.
The scanning will start in the corner of the scanned area which is closest to the current XY position.
Orientation of the resulting image will be adjusted to match the actual view on the XY stage without the eyepiece or camera.
 Draw Regions
This task is used to manually draw regions during acquisition. Once the capture is made, the job is paused and Simple ROI Editor is shown over the Draw Regions window. Please see ROI > Simple ROI Editor for more details about drawing regions. Once you finish the drawing, click to continue the job. | Requires: Task: Module: |
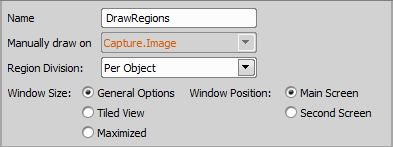
Figure 1242.
Name of your Large Images > Draw Regions task.
Regions can be treated Per Frame - all drawn regions are considered as one area in the particular frame, or Per Object - each region is treated as a single object.
 Shift Region
 When Multimodal Image Registration (Image > Channel Alignment and Registration > Multimodal Image Registration) is used, shift of the regions can be made. Use this task for comparing images from SIM and Confocal. | Requires: Module: |

Figure 1243.
Name of your Large Images > Shift Region task.
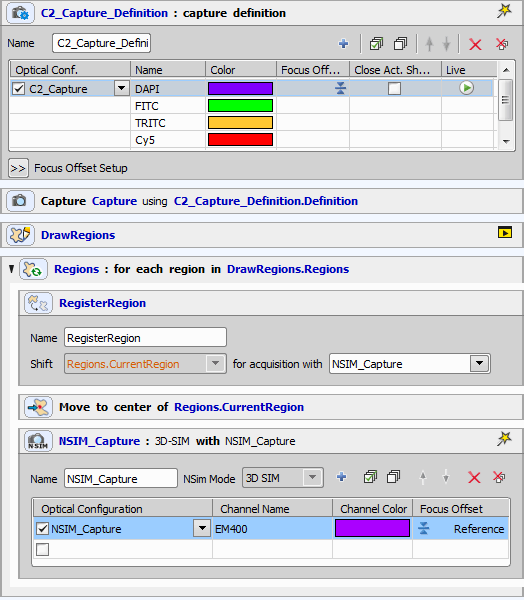
Figure 1244. Typical example using Large Images > Shift Region to compensate the shift between C2 and NSIM capture:
The job defines one Acquisition > Capture Definition for C2 which is used to Acquisition >  Capture an image on which regions are defined using Large Images > Draw Regions. Then the job loops over these regions automatically compensating the shift (Large Images > Shift Region) between two registered systems (stored in Image > Channel Alignment and Registration > Optical Path Corrections). Large Images >
  Move to Region Center moves the stage to the center of each region and captures an image using
  NSIM Capture.
 Edit Regions
 Enables the user to edit regions during the job. The job is paused and Simple ROI Editor is shown. Please see ROI > Simple ROI Editor for more details about drawing and editing regions. Once you finish the edits, click to continue the job. Execute the job and change the regions on the fly. | Requires: Module: |
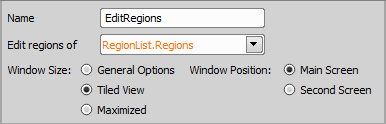
Figure 1245.
Name of your Large Images > Edit Regions task.
Select which regions are to be edited (e.g. from Analysis >  General Analysis or from Large Images > Draw Regions).
 Region List
 This task is used as a blank list which can be filled with regions inside the General Analysis > Calculations tab (please see General Analysis). Use the analysis to automatically create the list of regions which can be utilized in the jobs sequence later on. | Requires: Module: |

Figure 1246.
Name of your task.
Loop over Regions This task can be used to execute contained tasks over a set of regions in a loop. Capture high-magnification images of all predefined regions. | Requires: Module: |
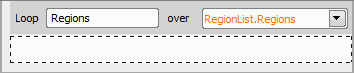
Figure 1247.
Selected Large Images > Region List task containing regions for the loop.
Move to Region Center Moves to the center of the region. Capture region centers of all predefined regions. | Requires: Module: |

Figure 1248.
Defines in which Large Images > Loop over Regions the movement to the center of a region will be performed.
 Append Region List to Region List
 Adds selected regions to the selected region list. Append user defined regions to the list created by general analysis. | Requires: Module: |
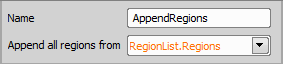
Figure 1249.
Name of your Large Images > Append Region List to Region List task.
Deletes regions from the selected region list. Select a region list and delete its contents. | Requires: Module: |
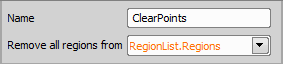
Figure 1250.
Name of your Large Images > ![]() Clear Region List task.
Clear Region List task.
Creates an empty region. This task is useful e.g. to scan an overview of all slides in the slide loader, then the regions are drawn on all slides and the system scans the regions. Add an empty region on low magnification capture for each slide in the slide loader. Then prescan all slides, draw ROIs on each slide manually and scan them in high magnification. | Requires: Module: |
Adds an empty region on the selected capture.
 Store Region Overview
 Stores an overview image of the regions, which serves as a reference for the goal of the job which is to detect / draw regions in the image with a small resolution are then capture them in high resolution. Without this reference, one does not have much insight into where the individual regions are located. Capture a low magnification (2x objective) image of the whole slide, detect interesting regions on it using General Analysis 3, capture those regions in high magnification (40x objective). From these regions it is possible to save an overview showing where they are stored (as binaries in the intensity image, 0 = nothing, 255 = region). Also ROIs with their names are stored (vector plane over the image). | Requires: Module: |
Name of your Large Images > Store Region Overview task.
If checked, task requires to select the image source (typically from a Large Images > Scan Large Image in Region or Acquisition > Capture task). These images are then reduced to the overview resolution (e.g. 2x objective) and placed into the overview on corresponding places. Thus an overview with real data and not only binaries is created.
 Extract Region List
This task is used for marking and filtering regions. It extracts regions from a region list (From) marked with a Region Tag into a specified region list (to). Use the button to find the region tag. The typical use case involves creating a large list of regions through user interaction, often by drawing them, and then labeling each region with the corresponding text tag and sequentially extracting regions from the large list and populating a smaller list based on their assigned tags. While the extraction process can be accomplished using this specific task, the marking of regions needs to be performed through common tasks such as Large Images > This example job uses the slide loader for iterations over slides. Initially, user defines regions on each slide and then the system automatically scans all the regions. The slide name serves as a tag, ensuring that the system uses the appropriate list of regions for the slide currently being on stage. | Requires: Module: |
 Expression
 Use Regions from Sample Navigation
Utilizes the regions created in the View > Acquisition Controls > Sample Navigation Use the previously drawn regions in the current job. | Requires: Module: |
