
(requires: Stage XY axis)
A motorized XY stage is required to have the Large Image tab enabled within the ND Acquisition window. When set to work, it captures several frames within a defined area and stitches them together, so you get an extra large image.
Note
When camera ROI on Live Image is on (see: Camera ROI), only its frame defining the sensor area is used during the scanning.
Calibration for the current hardware configuration.
Application during large images stitching.
(requires: Local Option)
This function attempts to correct for geometrical image distortion, which is an unwanted effect of certain optical systems and manifests itself as duplicated sample structures near the overlap regions of large image tiles.
Some hardware configurations are more susceptible to this effect than others, but the most common source of the problem is a camera coupled with a relay lens with a zoom other than 1x.
This is an example taken by a Nikon Ri2 camera with a 1.8x relay lens:
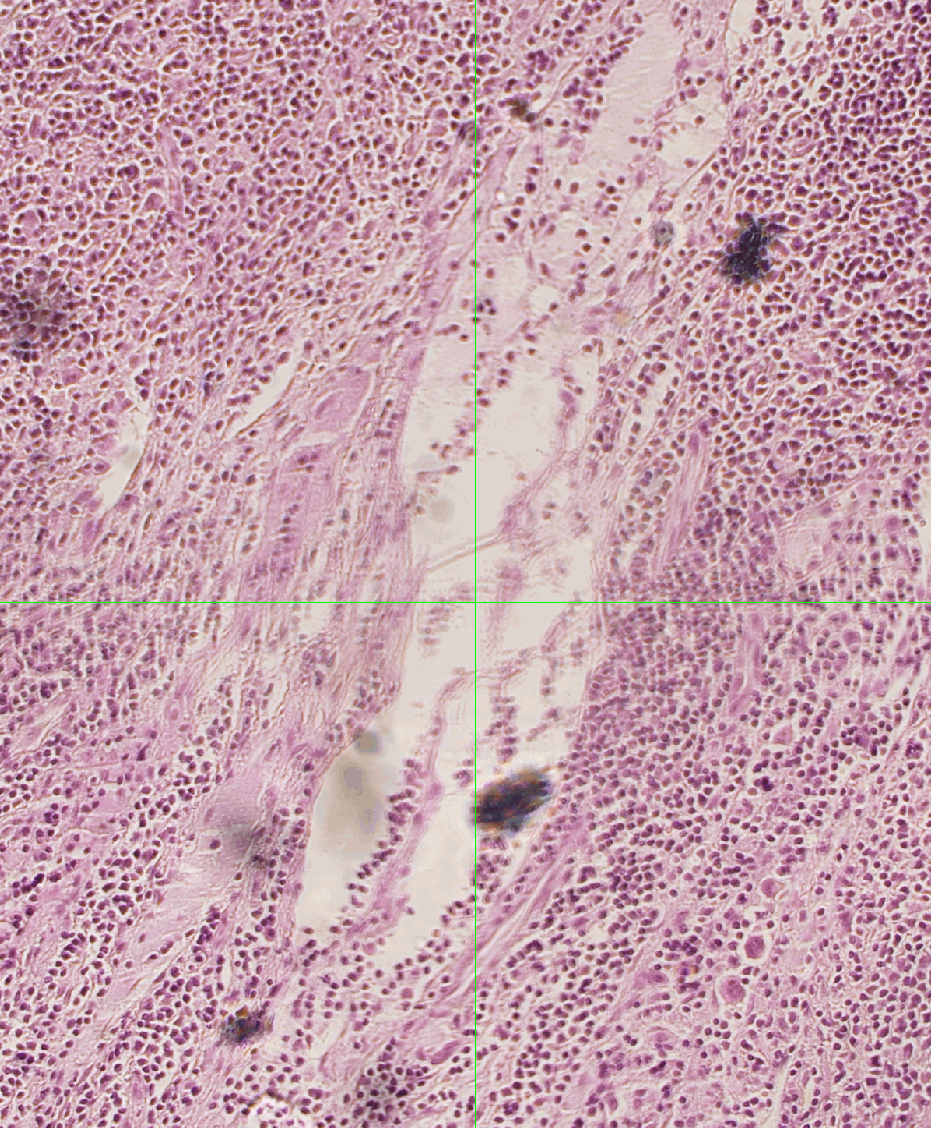
Figure 192. Normal stitching without the distortion correction.
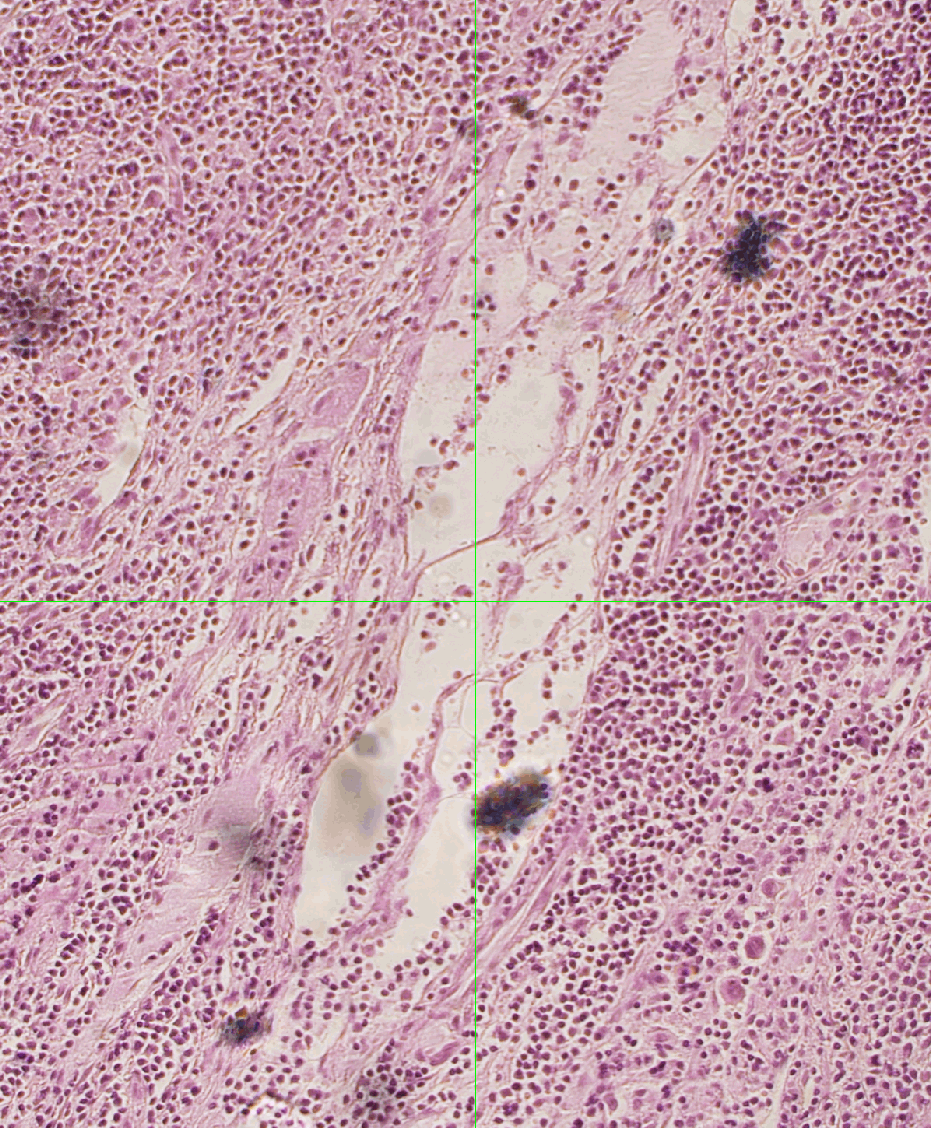
Figure 193. Stitching with the distortion correction ON.
The green crosses mark the boundaries between large image tiles.
The correction proceeds in two steps:
Start the calibration by clicking the  right mouse button inside the Live image and selecting Create Distortion Correction Maps for Current Settings.
The function is designed to work for both bright field and fluorescence modalities. Before running this function, make sure you see a focused, sufficiently bright but not oversaturated, dense sample that ideally covers the entire camera field.
Note
Samples with periodically repeating structures (e.g. calibration slides), samples not covering the FOV or samples not in focus are not suitable for calibration.
Examples of suitable and unsuitable scenes:
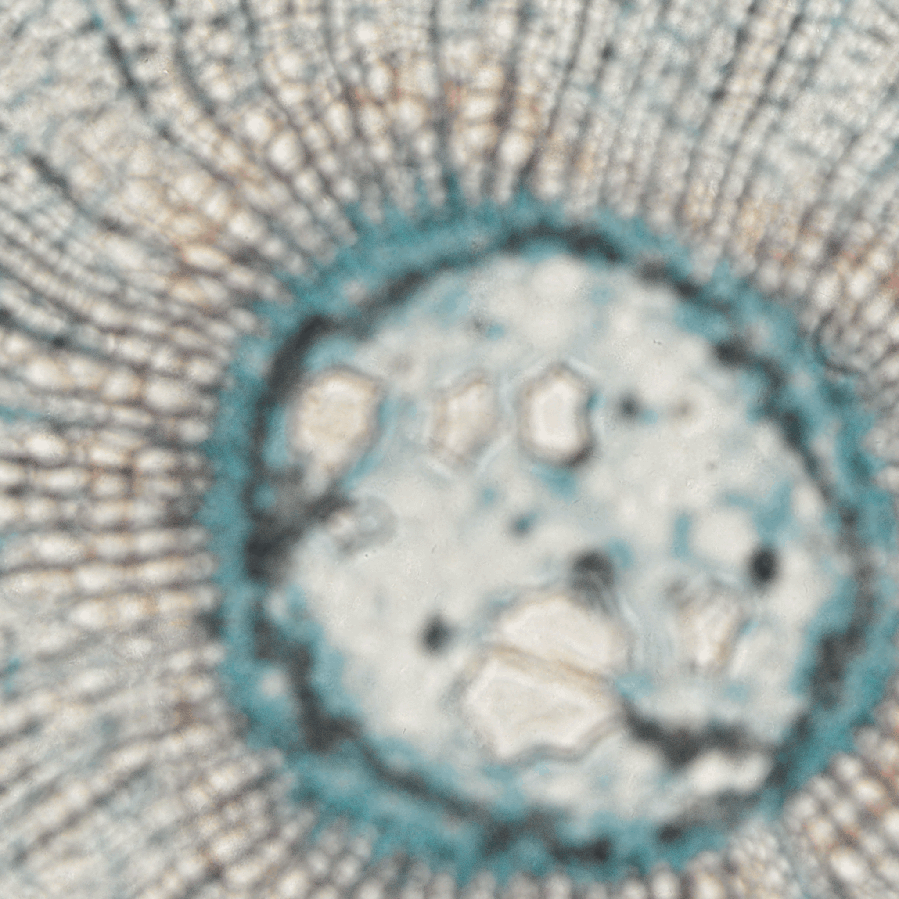
Figure 194. Unsuitable scene - not in focus.
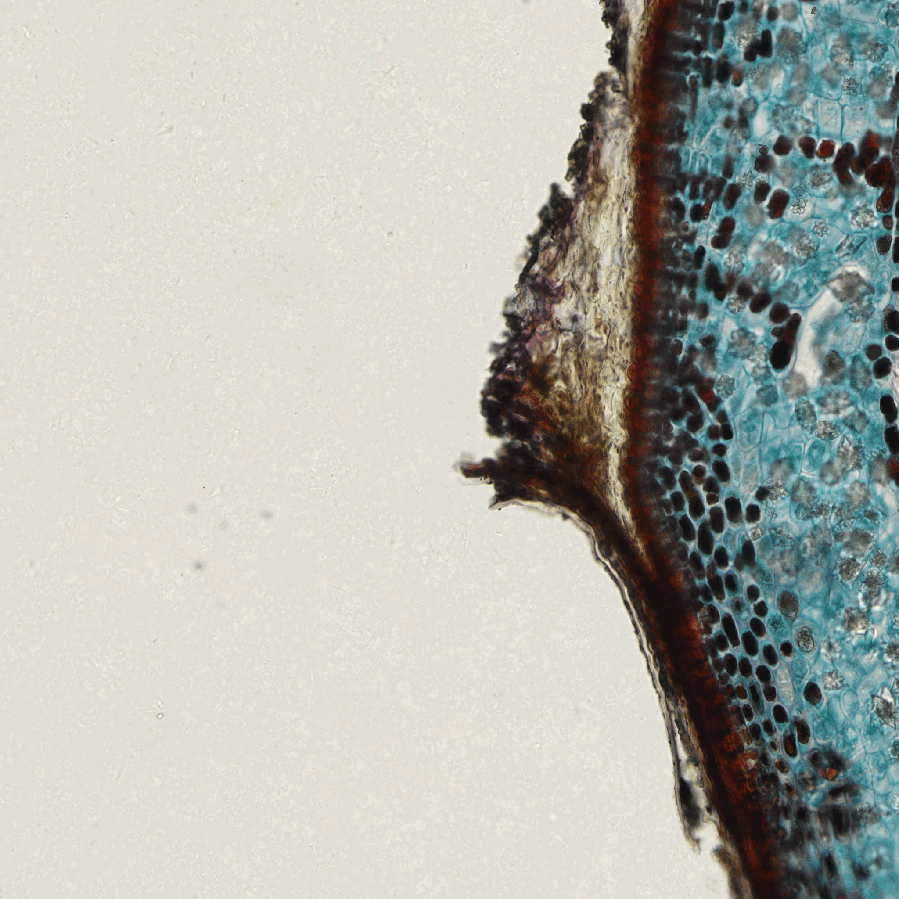
Figure 195. Unsuitable scene - sample not covering the FOV.

Figure 196. Unsuitable scene - sample featuring periodic structural patterns.
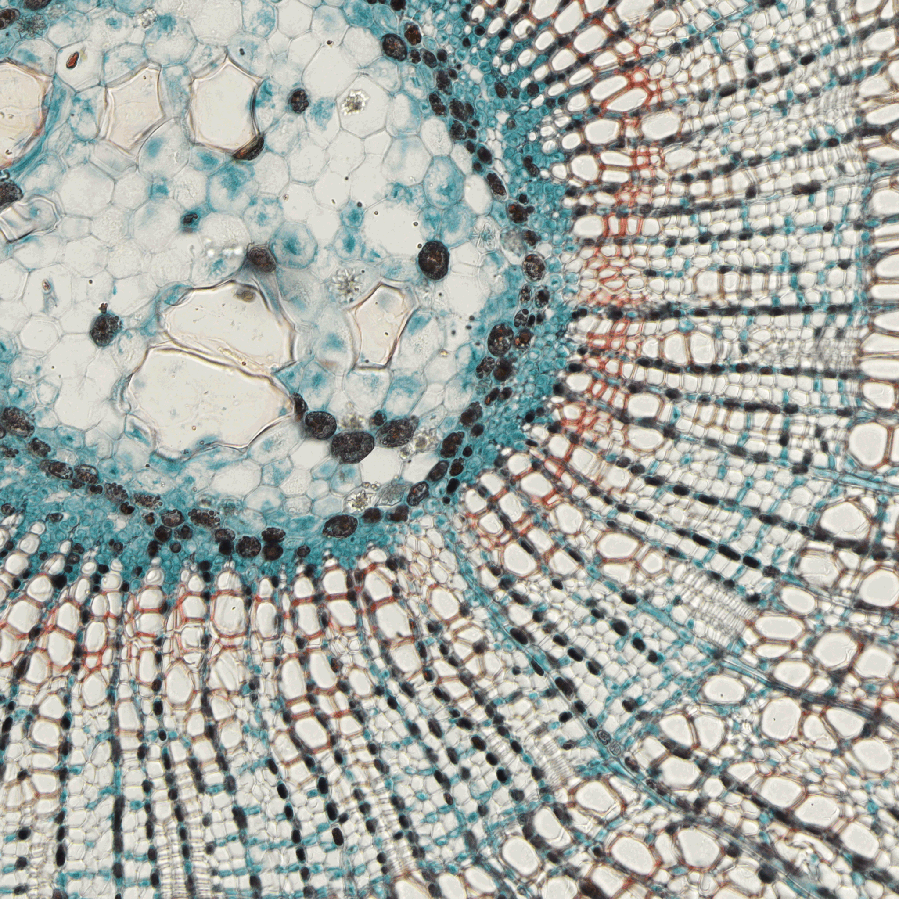
Figure 197. Suitable scene.
After the calibration is successfully finished, the computed distortion maps are saved to the NIS-Elements platform folder and tied to the current hardware configuration (microscope port, objective, camera ROI, light wavelength, zoom, etc.). You can run the calibration multiple times for different configurations.
The application of the distortion maps can be switched on in the Acquire > Scan Large Image function. Make sure you use identical hardware settings as in one of the calibration runs, otherwise the correction will not be applied.
The area can be defined in three ways:
Check the first radio button and define the number of rows and columns of the scanning grid.
Check the second radio button and define the size of the scanned area in millimeters.
Click the button and select an XML file containing a large-image pattern.
This XML can be created using the _LargeImageGrabbingFreeShape macro function.
Caution
Do not mistake this XML with similar XMLs created by other functions. For example, XML files saved via the  Acquire > Capture Multipoint > Capture Automatically window will not work here.
Define the stitching method:
Enter the percentage of image overlapping which is used for image stitching.
If checked, the system automatically stitches the images together to form a large image using a precise stitching algorithm (image registration). If there are more channels available, select which one to use from the pull-down menu (Use).
If unchecked, the system will stitch the images together with the defined overlap using the recorded XY coordinates but without using the Image Registration algorithm. Stitching can also be done manually after the acquisition finishes via the File > Stitch Large Image from Files command.
If checked, the Perfect Focus System (PFS) is utilized. A new “PFS” column is shown in the table with a button filling in the PFS value. Context menu over the value enables the user to Offset All Points in PFS or to Reset All PFS Offsets which sets the same (current) offset for all points.
Focuses using the surface defined in the Focus Surface tab of the View > Acquisition Controls > XYZ Overview  panel.
This delay between captures can be used for sample stabilization, e.g. after XY movement or autofocus.
NIS-Elements offers multiple ways how to capture a large image:
Acquire > Scan Large Image The most complex large image acquisition.
Acquire > Manual Large Image Custom large image acquisition for manual area selection.
A tab inside the ND Acquisition window used when the area of interest exceeds the camera FOV.
Addons > Large Images > Scanning Wizard  |
Addons > Large Images > Scanning Wizard EDF  |
_LargeImageGrabbingFreeShape A large image created by stitching (obsolete function only executable by a macro).
_LargeImageGrabbing Large image grabbing (obsolete function only executable by a macro).