Click this button.
A dialog box appears where the new Z-step can be set:
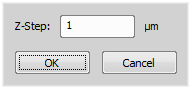
Figure 2101.
Set the step size and confirm it by OK.
Click the Edit T-Step button.
A dialog box appears where the new time interval can be set.
Set the interval length and confirm it by OK.
Opens the image currently selected in the active organizer panel and displays it in the Image Layout.
This command opens the Image Properties dialog. The dialog appearance may vary according to the type of image. In case you are inspecting an ND2 file properties all the following tabs are accessible.
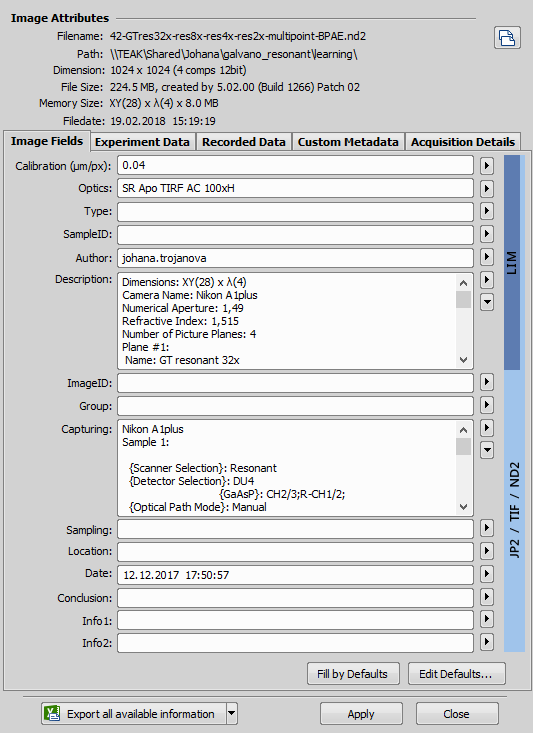
Figure 2096.
Displays the file properties which are provided by the system. Among these properties you can find the file name and location, dimensions of the image, file size, and file date. The version of NIS-Elements including the build number in which the image has been saved is also stored in the image metadata.
The software can determine whether the current image was modified after acquisition. To indicate it, a green text “Original” or a red text “Modified” appears in this dialog.
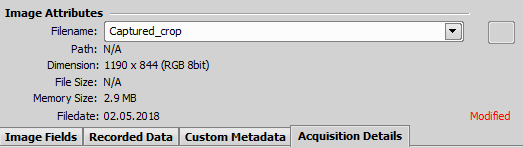
Figure 2097. Image Attributes of a cropped image
The “Modified” text has a different meaning depending on its placement in the dialog:
General changes of image attributes like size, bit depth, number of frames.
The metadata mentioned on this tab have been changed.
Click the button to update status of all image frames. Changes in raw image data will be detected for each frame.
Note
Image authentication can be turned off via the Edit > Options  command.
 Copy Full File Name to Clipboard
 Full path to the current image file is copied to clipboard.
This button exports the data of all tabs at once. Select the destination where to export the data. See also Exporting Results.
This tab appears for all image types. These fields have changeable content. The fields are related to better file recognition, so you can for example specify the image ID, enter any description you like, write you own conclusion and many more. The line on the right side of the fields indicates relevance of the fields to file formats. LIM files use only the upper fields. JP2, tif and ND2 files contain all the fields.
Default values can be predefined by the user (they will be prefilled every time a new image is being saved). Insert these values in the current table by the Fill by Defaults button.
Press this button to open a Default window. Specify all the default content. You can edit all fields. The content can be relative - every time you click the Fill by Defaults button, the current image data will be used, or you can enter fixed content.
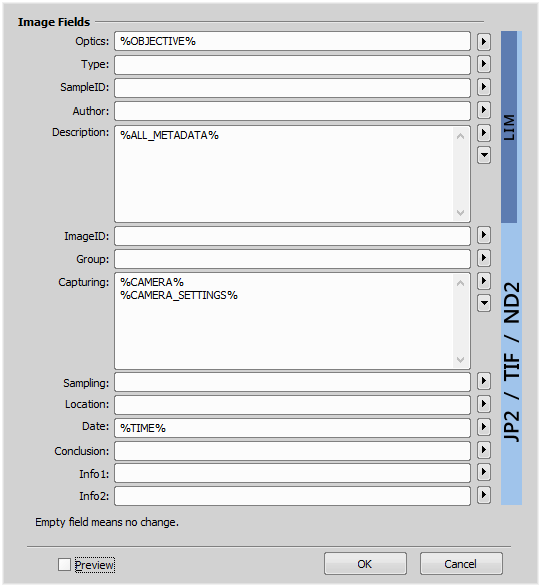
Figure 2098.
 , Substitutional keywords
 The system enables the user to insert some predefined keywords inside the Image Information table. When saving an image, the keywords are dynamically replaced according to the current system state. E.g. the current objective name can be inserted:
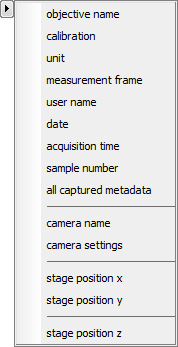
Figure 2099.

The Description and Capturing fields may contain many rows of text. Use this button to view/edit it in a separate resizable window.
This tab appears when you are working with ND2 files. The experiment data tab displays the information about the performed experiment. Provides a summary information about the ND experiment process: if the ND2 file contains spectral, time or z-stack loops, settings of all available dimensions are included.
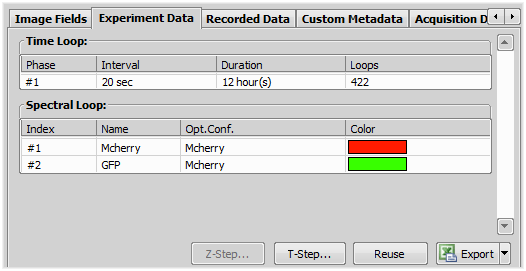
Figure 2100.
The calibration of the Z axis may be modified.
If the ND2 file contains only one phase, the interval between the time loops may be modified.
New step value affects the Time Loop parameters.
Reuse the current ND image setting for creating a new ND2 file. The ND Acquisition window appears with the experiment defined. You can start the new ND acquisition experiment by pressing the Run Now button.
This button exports the data to clipboard, MS Excel application, or an external *.txt file. Select the export output from the pull-down menu next to the button.
The Recorded Data tab contains a table with information about single frames ordered subsequently:
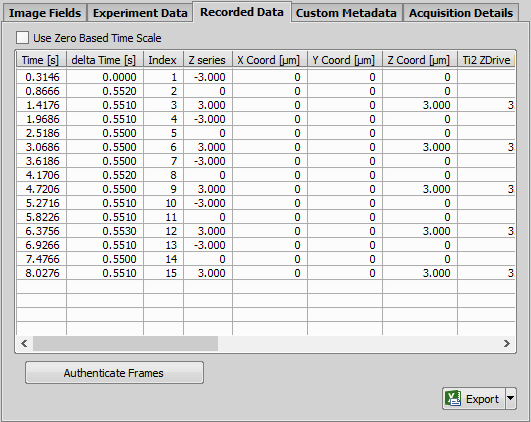
Figure 2102.
Sets acquisition time of the first frame to 0 and adjusts all other time stamps relatively to their time offset from the first frame.
Time when the frame was captured in sec. It is counted from the experiment start.
Time difference between adjacent frames.
Index number of the frame.
Z position of the frame.
Other device data selected for recording during ND acquisition.
See Recorded Data.
Displays performed user events during acquisition.
Press the ... button to open the Edit Events window.

Figure 2103.
Select type and time of an event and append an arbitrary description.
Performs authentication of all image frames. Frames are tested whether they have been modified after acquisition or not. The Enable authentication option must be turned ON in Edit > Options , otherwise this button is hidden.
This button exports the data to clipboard, MS Excel application, or an external *.txt file. Select the export output from the pull down-menu next to the button.
Any custom-defined metadata can be stored inside ND2 documents. This metadata can be defined in Image Properties, ND Acquisition and JOBS.
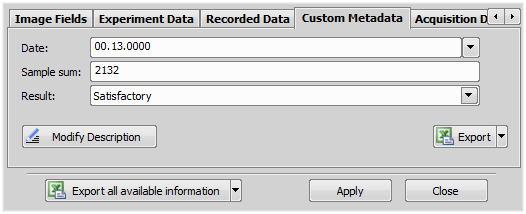
Figure 2104.
 Add/Modify Description
 Opens the Modify Description dialog window where metadata can be altered.
This button exports the metadata to MS Excel, external *.txt file or to clipboard. Select the export output from the pull-down menu next to the button.
This tab displays information about the hardware settings used to capture the image. The following values can be displayed:
| Camera name |
| Optical configuration name |
| Microscope name |
| Emission and Excitation wavelengths of each channel |
| Channel modality of each channel |
| Refraction index and numerical aperture of the objective used |
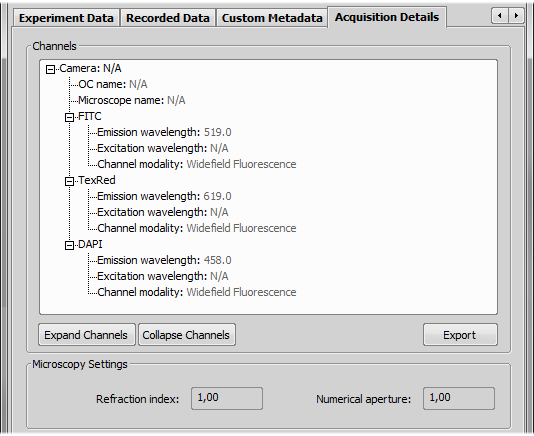
Figure 2105.
Use these buttons to expand or collapse the tree with channel descriptions.
Click the button to unlock the right column where you can edit information about the channels. Select new values from pull-down menus (Channel modality) or double-click the fields to edit them (emission wavelength, excitation wavelength, ...).
Press this button to save the acquisition details to a .txt file. A standard Save As window appears.