Open JOBS Explorer
Connect to a job database
A database for storing the job data must be opened or created before running a job. Use the database pull-down menu within JOBS Explorer. See Job Database.

Figure 1027. Database pull-down menu within Jobs Explorer
Run the HCA Job template
Click one of the buttons in the Run: section of JOBS Explorer. The following jobs are prepared there with the HCA module installed:
HCA FixedAnalysis of fixed samples prepared on well plates.
HCA LiveAnalysis of live (motile or growing) samples.
Define parameters of the JOB
The following window appears. You should browse all the tabs (tasks) and adjust settings of the job correctly. Once you visit a tab and the settings are acceptable - in the scope of the whole job - the background of the task icon turns green.
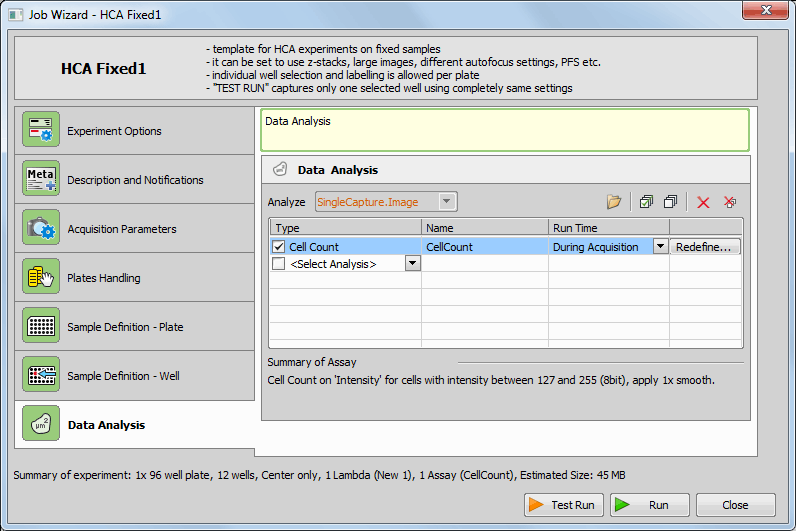
Figure 1028. HCA Fixed Job wizard enabling to set up parameters of the Job step by step.
Start by setting your first tab called Experiment Options (see: Defining Parameters).
Enter a description, custom metadata and adjust any other selected notifications (see: System >
 Custom Metadata, System >
  Send E-mail Notification, System >
  Send SMS Notification).
Select an optical configuration and define other listed acquisition parameters (see: Acquisition >
 Capture Definition, Optical Configurations >
  Auto Brightness, Z-Stack >
  Define Z-Stack).
If Autofocus was selected in the Experiment Options , adjust its parameters here (see: Autofocus + Focus Surface >
 Autofocus Settings).
Select plates which will be used during the experiment (see: Well Plates >
 Manual Plate List).
Define your plate and select wells used during the experiment (see: Well Plates >
 Define Plate, Well Plates >
  Select Wells).
Adjust parameters influencing the point generation and large image capture (see: Stage XY Points >
 Generate Points, Large Images >
  Scan Large Image).
Label wells if you selected Well Labeling (see: Well Plates >
 Label Well Plate).
Define parameters of the time sequence (see: Time Series >
 Time Lapse).
Define analyses which will be performed on the captured data (see: Analysis >
 Define Analysis).
Once you have set up all available tabs (all are highlighted green) you are ready for the job execution.
Test the job on a single well
You can click
 Test Run to run the current job on a selected well.
Run the job
When everything is set up correctly, click
 Run. The HCA Progress window opens.
See Job Execution Progress window for details.
Some tasks may appear during run time waiting for user interaction. These tasks have to be set up and confirmed by clicking
 Next / Run.
Browse the results
Results are displayed automatically in a separate window once the job is finished.
The window containing results from a HCA job is similar to the one used in job runs.
See chapter Running a Job, Viewing Results and Graphs for more information.

 View > Analysis Controls > JOBS Explorer