
The workflow to measure one image in a direct mode is:
Start the application
Open or capture an image
Set or select a detection preset
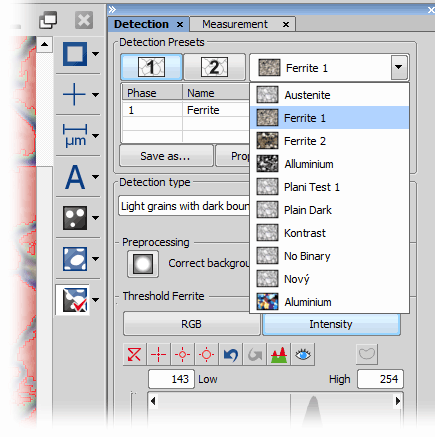
Figure 363. Preset Selection - Detection
Check the detection
Use the
 Show Detection button.
Set or select a measurement preset
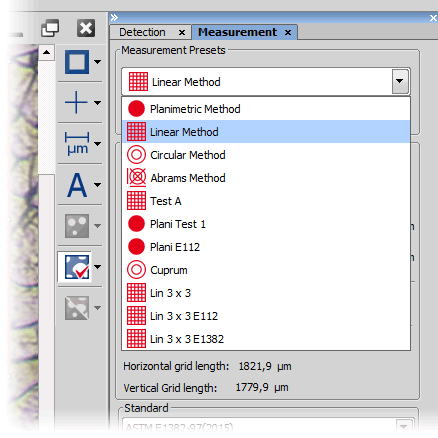
Figure 364. Preset Selection - Measurement
Display the mask and check it.
Use the
 Show Mask button
Run the measurement
Use the
 Start Measurement button.
After detection, the software continuously measures all necessary parameters, calculates the Grain Size value and displays it in the
 Data
Data  panel.
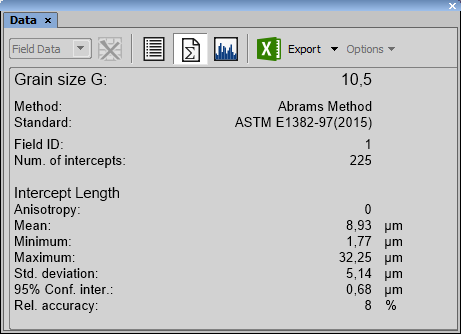
Figure 365.
Make manual corrections
After the software applies the measurement mask to the detected grains, manual corrections can be made. If you make manual corrections either in the planimetric method or an intercept method, the GS value gets recalculated with every change. See Planimetric Method, Intercept Methods.
Review data
Click on the
 Show Data button to display detailed data, you can switch between Object Data and Field Data.
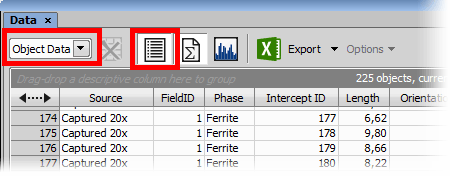
Figure 366.
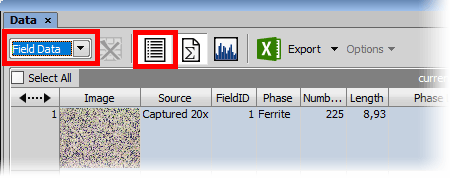
Figure 367.
Click the
 Show Histogram button to display a histogram. You can select the measured feature displayed in the histogram in a pull-down menu. Object data can be displayed also as a table.
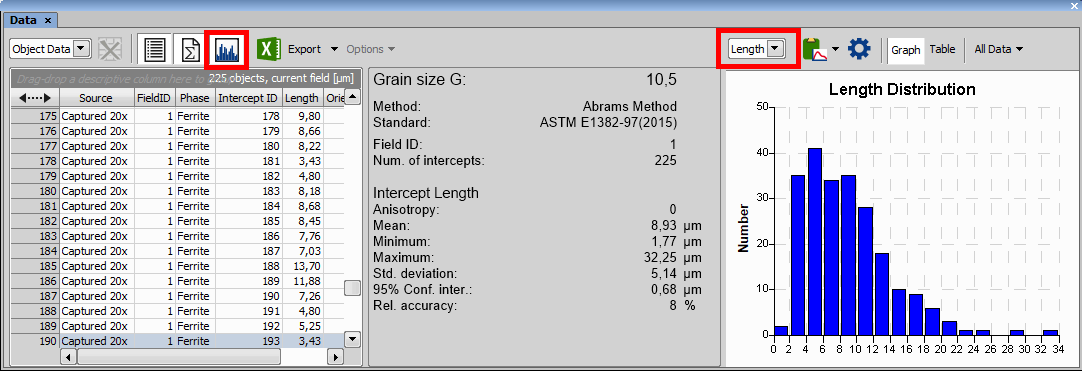
Figure 368. Histogram and feature selection
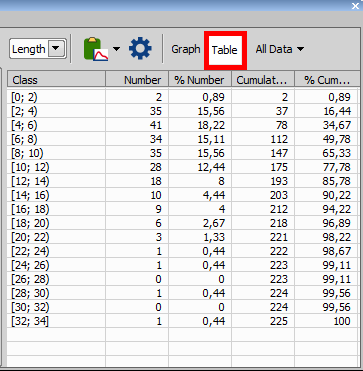
Figure 369. Histogram data
See reference: Data Panel.
Confirm or cancel the current field
Use one of the buttons on the left tool bar:
 Finish Measurement
 Stores measured data of the current field under a Field ID, clears overlay layers and prepares for the next field.
 Cancel Measurement
 Discards measured data of the current field, clears overlay layers and prepares for the next field.
Note
When you finish the measurement with the Field Data option selected in the
Data panel, the last field gets selected. Data of this field are displayed in the statistics and the histogram. If you select the Select All option, the statistics will be always calculated from all fields. 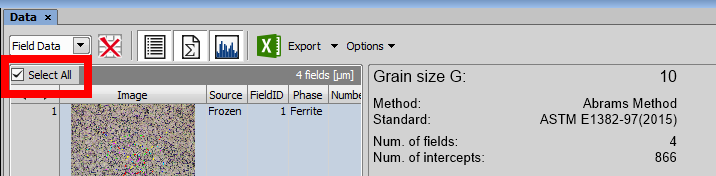
Figure 370. Current field data
Repeat the procedure
Repeat the procedure on multiple fields. Once finished, export the results to a report or elsewhere. See Data output and Reports.