Acquisition with PA-fluorescent molecules
Advanced Research package (NIS-ELEMENTS AR- MQS31000)
6D acquisition (NIS-A 6D- MQS42560)
NIS-A RT Acquisition (MQS42780 )
NIS-D Wavelength Switcher (MQS41930)
Illumination sequence (LW_IS)
Image analysis
NIS-A Advanced 2D Tracking (MQS42900) or LW_3DTRACK 2D+3D tracking+3D Meas (LW_3DTRACK)
SPT processing (LW_SPTP)
I-SPT uses the localization microscopy methodology to isolate the signal of single molecules.
Localization microscopy as opposed to bulk imaging uses the photo-physics of the fluorophore to sequentially illuminate single molecules and detect them.
Bulk imaging: Fluorescent molecules (green) are numerous and cannot be detected individually:
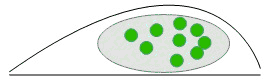
Figure 1431.
Localization microscopy: only a few molecules are emitting in the imaging channel (red) and its position can be individually accurately estimated:
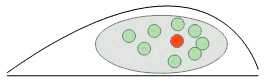
Figure 1432.
Different methods (specific buffer, photo activating UV laser, ...) can be used so that only a small sub-sample of fluorescent molecules are “on”. In the nucleus, the signal can be significantly enhanced by tilted illumination:
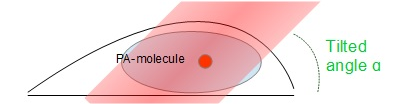
Figure 1433.
Any localization microscopy hardware is eligible to I-SPT module. The following protocol is dedicated to acquisition with photoactivatable proteins.
Photoactivatable proteins can be switched to a new fluorescent state upon activation with UV laser. Single molecule regime with low activation power:
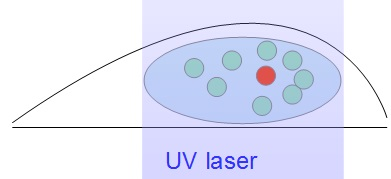
Figure 1434.
Here, we show how the illumination sequence of NIS elements can be used to accurately illuminate a sample tagged with photoactivatable proteins and reach the single molecule regime required by I-SPT. We use two lasers:
Activation laser needs to illuminate the sample with very low power between frames so that a fluorescent does not “pop out” during acquisition.
Illumination laser needs to illuminate the sample with very high power during frame acquisition for high signal to noise ratio.
Exposure time needs to be set prior to illumination sequence settings for the camera. Typical exposure time for target moving inside the nucleus is 10 ms.
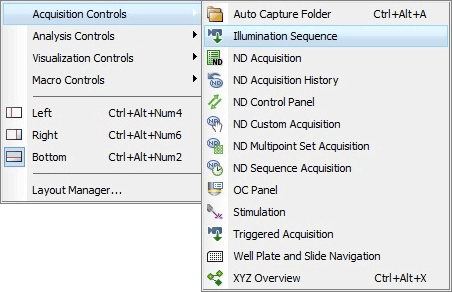
Figure 1435.
Launch  Acquire > Illumination Sequence.
Assign current camera settings (ROI, frame rate).
Create an image channel and drag and drop it into the phase sequence.
Drag and drop excitation laser.
Drag and drop activation laser. Right click Edit >Custom. Activation shall start at “exposure end” and stop at “next exposure start”.
Set a low level of activation at first (5%). This level will be adjusted if necessary during acquisition by double clicking on the activation cell:
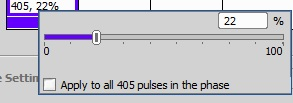
Figure 1436.
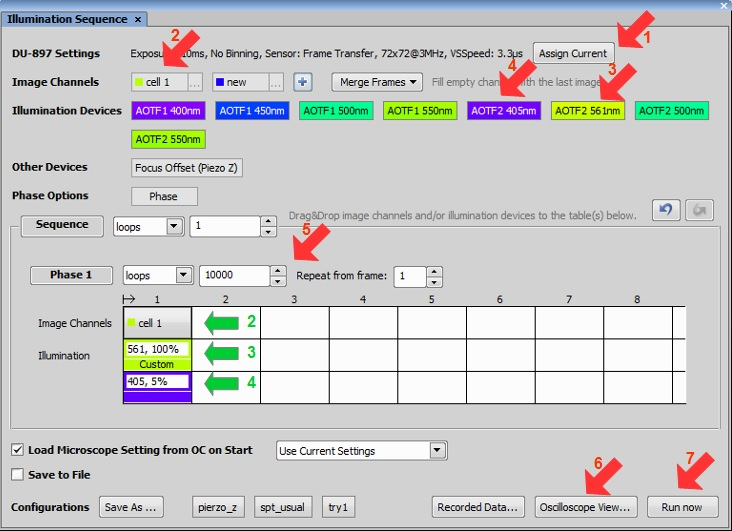
Figure 1437.
Set a number of loops.
Check the sequence with the oscilloscope view:

Figure 1438.
Run the sequence.