
Turn on the system and all the devices, insert a typical filter.
Check the camera settings and objective calibration. Follow the instructions:
Move the camera over the sample area.
Click
 and open the Camera Settings control window. Here you can check the camera exposure. You can also set the Gain, Offset, Gamma and Saturation parameters, and use the Auto Exposure and Auto White options. In the histogram graph, while using the color camera, you can display either all the channels in one graph, or separately. All the changes are immediately visible in the live image. Confirm the setting by clicking .
Figure 386. Input Setup window
Open the Objectives window by clicking
 Objectives from the main toolbar.
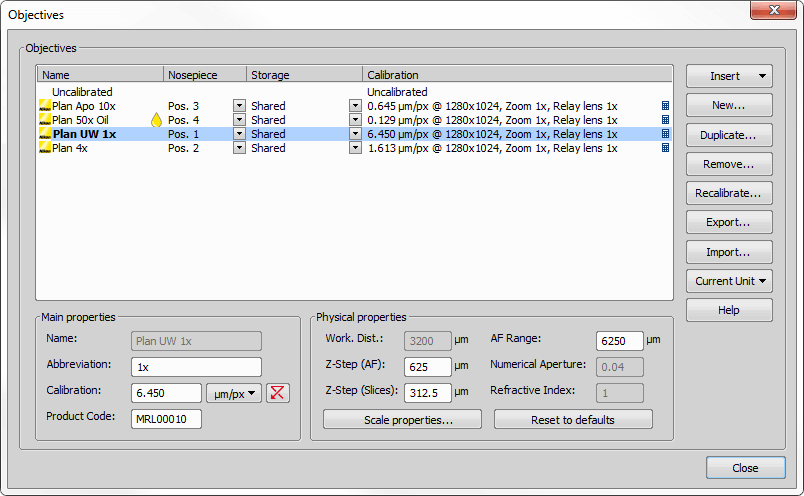
Figure 387.
Use in the right part of the window to add a new objective and follow the instructions to calibrate it.
Choose a Calibration Method and click .
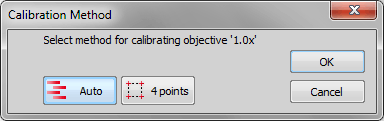
Figure 388. Calibration Method dialog window
After finishing the calibration select the newly calibrated objective as active (in the context menu over the objective choose Set as Active. Current objective is shown in a blue color in the bottom status bar.
Check the camera orientation – click
 Objective Info. Objective Info dialog will display information about the camera angle. Indicated angle should be as close as possible to 0 or 180 degrees. If the angle is way off from these values, you should recalibrate the objective.
 Live
Live