
During the scanning process you can follow the sequence of icons in the left tool bar.
Before you start the scanning, please make sure the camera and objective settings are properly calibrated - see System settings.
Optimal illumination should be set before analyzing any filter. Move the XY stage to the position, where the analyzed part of the filter is well visible. Software can assist you in checking and setting the optimal illumination. Click
 Adjust Light to show the Check Illumination dialog window. Mean Intensity and the Overexposure Ratio characterize the scene and show recommended values. In case you decide to use this routine, you need to setup the recommended intensity and over-illumination tolerance to be compliant with your system. This is done in the Scanning tab of the
  Options dialog (see Advanced Scanning).
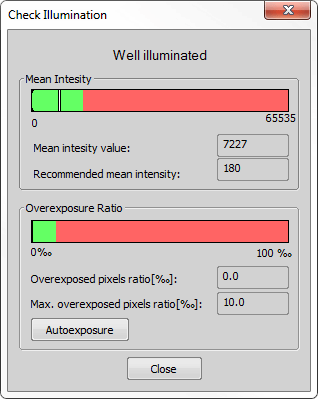
Figure 592.
Click
 Define Position to start defining the filter position. Follow the instructions shown in the window. Enter the diameter of the scanned filter. Current objective calibration is shown below.
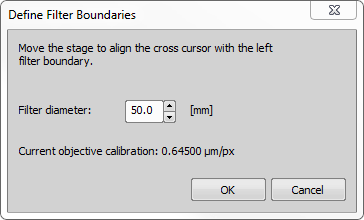
Figure 593.
Move the XY stage until the crosshair touches the left filter boundary. Then click .
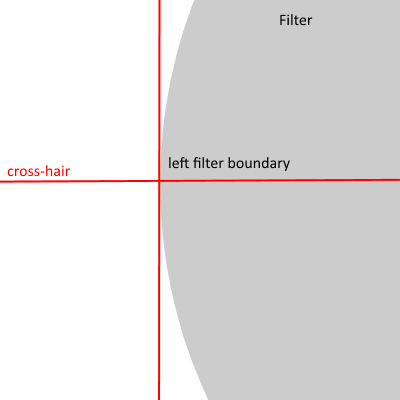
Figure 594.
Click
 Check Positions to check the filter edges. XY stage will reach the left filter edge and the following window will show up. Also a crosshair is shown in the camera image. It should cross the edge of the filter. If it does, click . If not, move the stage or drag the crosshair by mouse, so that the crosshair crosses the filter edge and click - the coordinates will be redefined to fit the point. Follow the instructions to check the filter edges.
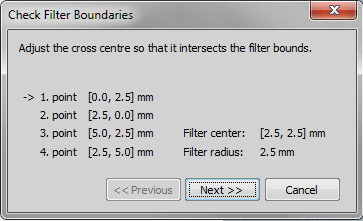
Figure 595.
Now move on to Scanning itself. By default, no autofocus is used during the scanning. If needed, go to the Focusing tab of the
Options (see Autofocus during scanning).Click
 Scan Filter to start scanning the filter.
Note
If the calibration in use is different from the recommended one, a warning window appears. You can set the calibration again (by selecting the correct active objective) or just click if you are satisfied with it and the recommended calibration will be set to the current value.
Note
If there is an opened file in the filter preview window, the
button will be disabled. In such case, click  to close this file.
The following window appears:

Figure 596. Scanning Progress dialog window
This dialog displays the scanning progress, information about the ratio of overexposed pixels and mean intensity. Pause the scanning by the
 button or quit the procedure by the
  button at any time.
Caution
If a continuous automatic exposure function of your camera is turned on, it will be automatically turned off until the scanning is finished. This is to prevent single tiles of the scanned filter to differ in brightness.
The filter is saved to the temporary folder by default, but it is possible to select a permanent storage to a defined folder (see point number 10). Files are saved as a .flt. file format which contains the image data of all the fields, scanning date, pixel calibration, real filter dimensions and measurement circle, number of fields, images, dimensions, and other morphological data of all measured and edited particles.
 Scan and Measure