Run the  Deconvolution > Show Live De-Blur Setup command to display the following window.
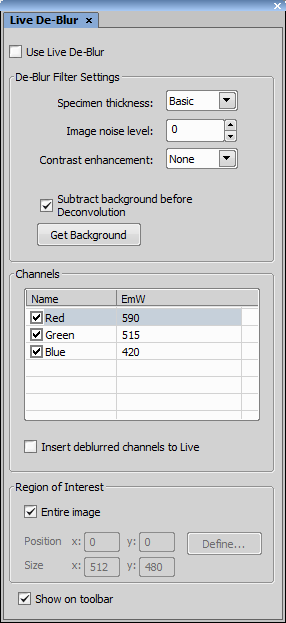
Figure 613.
Live De-Blur Options
Check this option to enable live image de-blurring.
Estimate thickness of the specimen: Flat, Thin, Normal, or Thick. This parameter influences the PSF shape.
Specify an estimation of the amount of noise present in the image.
This option specifies whether contrast post-processing shall be performed after deconvolution. Choose its strength from the combo box.
Note
If you are not sure about its strength, select None. After the deconvolution is finished, you can use the Image > Contrast  command instead.
Move the XY stage so that no signal (just background) is present in the live image and press the Get Background button. The background intensity will be computed from the acquired data.
If this option is selected, the channels selected for de-blurring will be appended to the original channels coming from the camera. A multi-channel image will be produced containing either the original channels and the processed channels.
Specify the ROI area. If you check the Entire image option, the ROI extends to the whole image. If you want to select just a part of the image, specify position of the top left corner and dimensions of the ROI.
Press the Define button to activate image window and you have to define a rectangular area of interest. Finish area definition using right mouse click.
Adds the  Live de-blur button into the main toolbar which enables the user to directly control the Use Live De-Blur option.