(requires: DBASE (Database))
Select the database to which the new table will be added. The list contains all connected databases.
Select a suitable table template, or Blank to start a creation from scratch.
Click Next.
Enter the Name and the Description of your new Table (e.g. MyDB). The description editbox isn't necessary to fill, but it is helpful to put down a short comment.
Define the table fields: click to the Name field and fill it in (e.g. with “Author”). Press Enter.
Select the data type of this field. This is done by selecting one option from a combo box. It appears after clicking into the Type field (see the list of types below).
Set one of the fields to be a title (the title is shown under the image thumbnail) by setting the Is title field to Yes.
Define all fields you want to store in the database and click Finish. A new table is created.

 These arrows rearrange the fields order.
 Deletes the currently selected field.
Text - Can be any single-line text.
Multiline text - Can contain any text. The lines can be separated by pressing Enter.
Date and Time - Can contain date and time using the following syntax: dd.mm.yyyy hh:mm:ss
Number - Can contain any number. If a decimal number is inserted, it is rounded off when saved.
Boolean - Can contain two values: true or false.
Decimal number - Can contain any decimal number.
Choice - Can contain one of the values predefined by user during the table creation in the Value section. Its usage is described above.
External link - Can contain a link to a picture, web page, or a program (e.g. “C:\Images\SampleImage01.jp2”, “www.laboratory-imaging.com” or “notepad”).
“<default value>” must be selected in the File field mapping combo box.
When Choice is selected as field type, and the List of values must be defined. Then, a combo box appears inside the Default value field where you can select one value of the list.
Author - the authors name.
Calibration - the image calibration in µm/px (decimal number).
Capturing - the camera name used to capture the image.
Conclusion
Date - the date of the file creation
Description - all available information about hardware settings of connected devices.
Dimensions - dimensions of the image in pixels.
Extern INI File - imports/exports the field value from/to an external *.ini/*.txt file (see below).
File date - the date of the file creation
Filename
Fluorophores - the number of image channels.
Group
Image ID
Info 1
Info 2
Location
Logged User - the name of a user connected to a database.
Optics
Original Path - the path where the file had been saved before it was imported to the database.
Sample ID
Sampling
Size - the size of the file on hard disk.
System Date - the day of importing the image to the database.
System Time - the time of importing the image to the database.
Time Steps - the number of time loops included in the ND2 file.
Type
XY Points - the number of multipoint loops included in the ND2 file.
Z Slices - the number of Z loops included in the ND2 file.
Selected database fields can be exported to an INI file when exporting the image from the database.
Database fields can be loaded from the INI file when importing the image to a database.
Switch NIS-Elements to the Organizer view.
Display the database in one pane and the directory tree in the other.
Drag the database record to the destination directory.
An INI file is created next to the exported image with matching name.
(requires: DBASE (Database))
This command creates a new image database. The following dialog box appears:
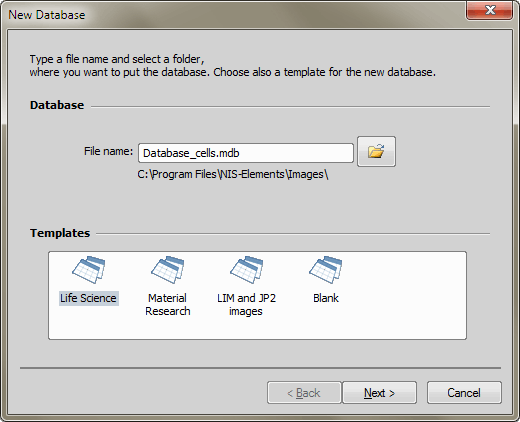
Figure 777.
Select the proper database engine from the pull down menu and specify the new database file name. You can also choose one of the prepared templates. Click on the Next button.
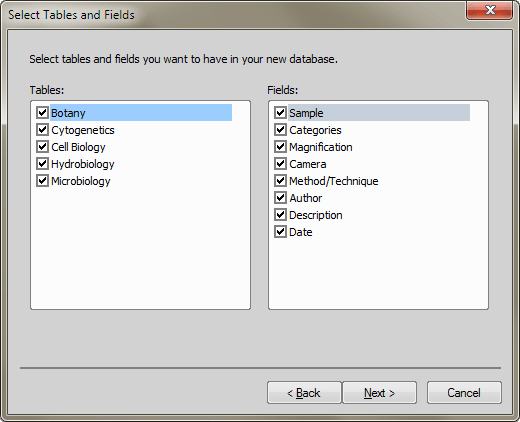
Figure 778.
If you have selected any of the templates, select tables and fields you want to use in the new database. Tables and fields choice depends on selected predefined database template.
If you have selected the blank database, this step is skipped. Specify the account protection in the following window.
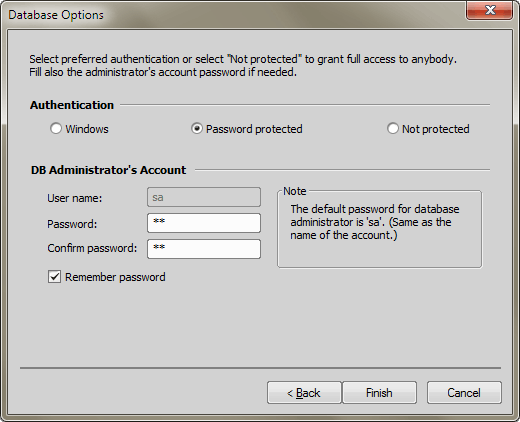
Figure 779.
Select the type of authentication. Then set the password to access the database. You, as the database creator, are automatically considered as an administrator (the user name is sa by default). The administrator is a user with all possible rights for the database. Click Finish to complete the wizard- an empty database is created.
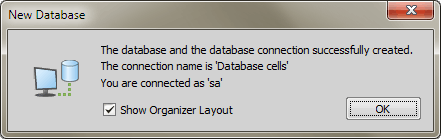
Figure 780.
A dialog appears informing you that the database was successfully created. If you leave the Show Organizer Layout option checked, the screen automatically switches to the database Organizer view.
(requires: DBASE (Database))
This command sets up a connection point to a database. The following dialog box appears:
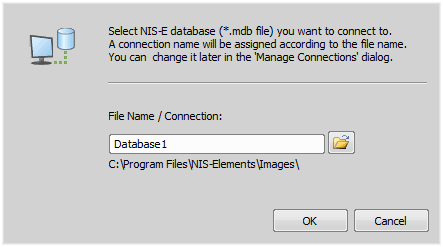
Figure 781.
Enter the database file name. Press the button. The connection name is assigned according to the file name.
Note
There is just one connection point for each database file. You can imagine the point as a shortcut to access the database.
(requires: DBASE (Database))
This command invokes the window from where you can manage connection points.
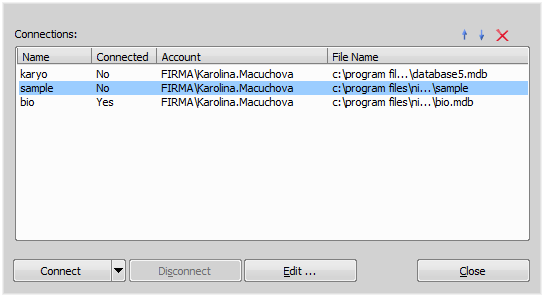
Figure 782.
There is a list of all connections with the paths to corresponding database files and the connection state. You change the order of database appearance in the list using the blue arrow buttons in the top right corner. The red cross button deletes the selected database.
You can choose the following options from the pull down menu:
This command connects you to the database.
Connect to the database as an administrator. Opens the Connect As window.
Connect to the database as a different user. Opens the Connect As window.
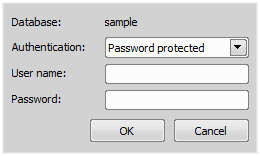
Figure 783.
Disconnects selected database.
Changes the name of the connection point. Opens the following dialog:
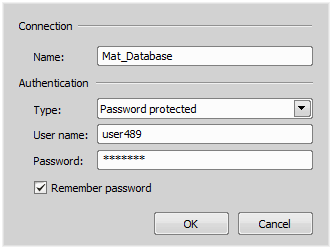
Figure 784.
Closes the dialog.

(requires: DBASE (Database))
This command enables you to create a new database table. Every database must contain at least one table.
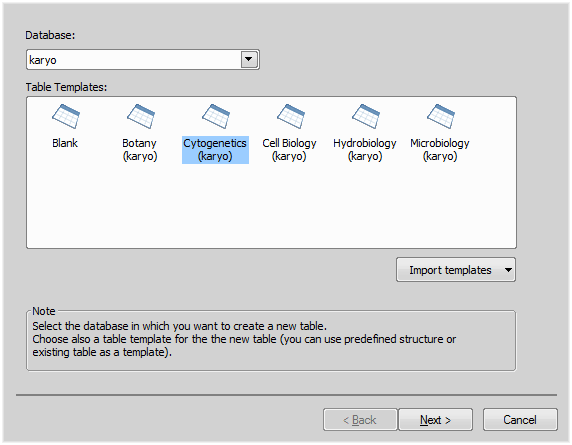
Figure 785.
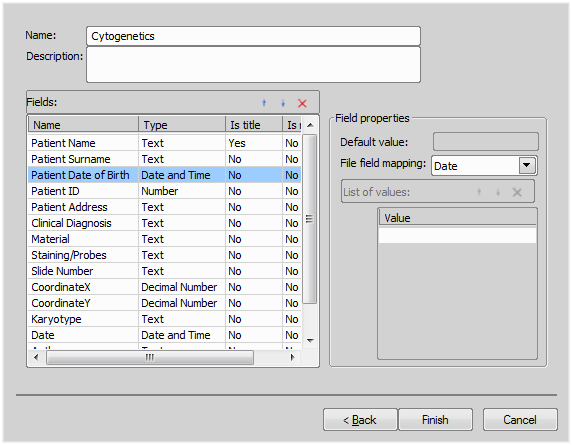
Figure 786.
Select the type of the database field. There are 8 available types:
If you enter a value inside the edit box, it will be preset as default when saving an image to the database table under the following circumstances:
This combo box enables you to link a database field with the information contained in image files. E.g. the field Author automatically fills with the author of the image. (Naturally, only in the case that the desired information is present within the image file.) The following mappings are available:
The fields that are to be exported/imported must have set the File field mapping option to Extern INI file in the database table settings (Database > Modify Table command).
(requires: DBASE (Database))
This command adjusts the properties of an already existing table. The following dialog box appears:
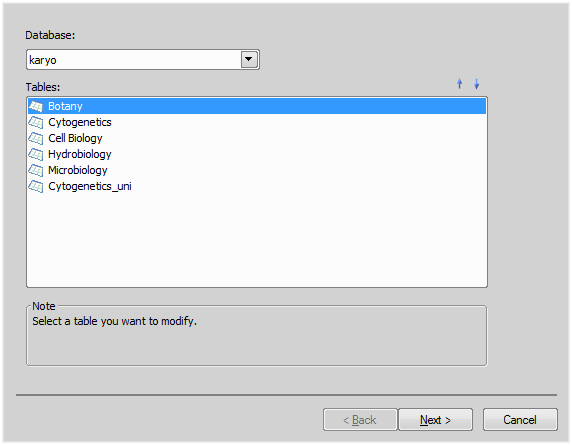
Figure 787.
Select the database from the pull down menu. Use the arrow buttons to rearrange the table list. Click Next and follow the instructions described in Database > New Table command.
(requires: DBASE (Database))
Removes a table and all its content from a database. The following dialog box appears:
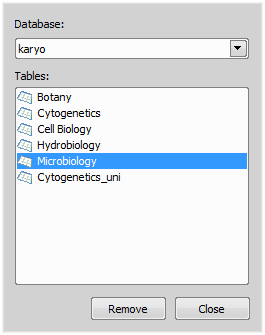
Figure 788.
Select the table you want to remove and click Remove.
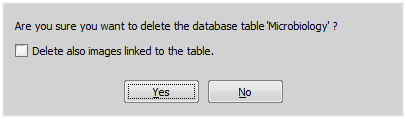
Figure 789.
NIS-Elements creates a directory to store images of each table during the table creation, the directory name matches the name of the table. It is placed in the database file directory. Copies of the source files from your disk are being created there for database purposes.
If you check the Delete also images linked to the table check box, all these copies will be deleted from your disk. Otherwise, the copies will remain untouched.
Confirm the deletion with Yes button.
(requires: DBASE (Database))
This command manages all database users and their rights. The following dialog box appears:
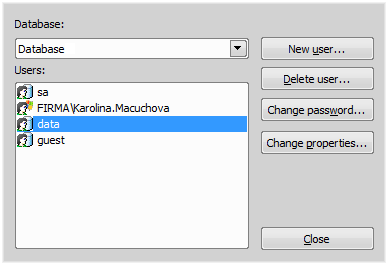
Figure 790.
This button creates a new user of the selected database. Note that only protected databases utilize user accounts.
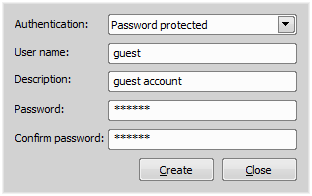
Figure 791.
Select the authentication type. Specify the user name. In case of Windows accounts, select a Windows user from the pull-down menu. In case of a password-protected account, type in the password (twice - for confirmation). Finish the process by pressing the Create button.
This button displays a confirmation dialog box - when you press the OK button, the account is deleted.
This button sets a new password for the selected user. A dialog box with two editboxes (Password and Confirm password) appears.
The Change properties button invokes the following dialog box where it is possible to set user rights (of the selected user) for various actions performed on a database. To set or ban rights, click into a check box.
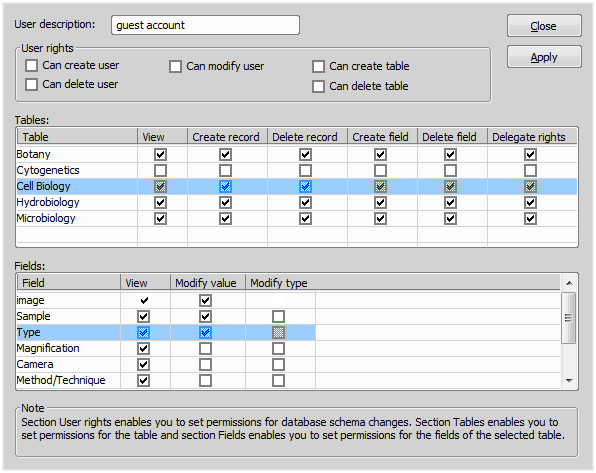
Figure 792.
Modifies the comments to a user.
This is used for defining, what actions are allowed to the selected user in a relation to other users and databases.
Displays a list of existing tables. It is possible to set the rights to view, create and delete tables, as well as the rights to create and delete fields and records in a table.
More detailed settings for each table are listed here. You can see only the fields that your rights allows you to view. You can set, which user will be able to view (or modify) every single field.
Click the Apply button to save the changes and the Close button to end the user rights editing. If you click Close first, you will be asked, whether to store changes or not.
(requires: DBASE (Database))
This command makes periodical (or single) backups of databases.
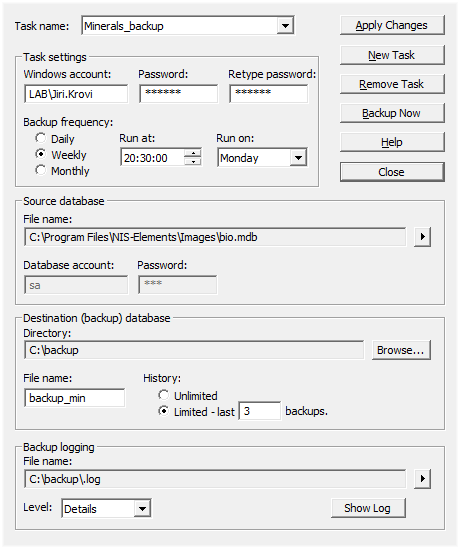
Figure 793.
The possibility to backup the database is essential for a serious work. The Database Backup Scheduler backs up the database automatically once in a precisely specified time interval, so you do not have to be afraid to loose any data. The Database Scheduler uses the standard Windows Scheduled Tasks tool (Start > Control Panel > Scheduled Tasks). Once you schedule a backup, there is only one condition to perform it successfully: The computer must be ON at the scheduled time.
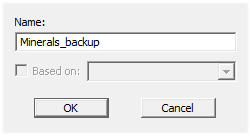
Figure 794.
To set a new periodic backup, click the New Task button. In the window that appears, specify the task`s name and click OK. If you already have some task that suits your needs, it is possible to copy its properties by checking the Based on check box and choosing it s name from the list.
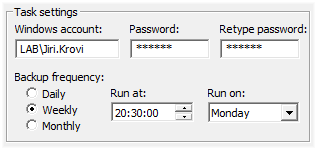
Figure 795.
Since the task is based on the Windows component, it is necessary to run it under a Windows user account. Either a local or a domain account is allowable (the domain name LAB is used in our example). After filling in the password, decide, how often the backup shall be performed. Daily, weekly and monthly intervals with a precision of seconds are available.

Figure 796.

Figure 797.
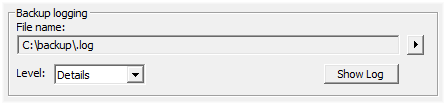
Figure 798.
Furthermore, the location of three following files on a disk is needed. Use the Browse buttons on the right side of the textboxes to specify the paths to the Source database file (the file to be backed up), the Destination (backup) database (a directory to which the backup file will be written) and the Backup log file where the information about the backup process is stored. The specification of all three destinations is mandatory. Without it, the backup cannot start.
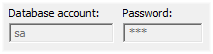
Figure 799.
In the Source database settings, there are the Database account and Password text boxes. Still, they are not editable and are of an informational kind.

Figure 800.
When performing the backup periodically, the already existing (the latest) backup file`s con tent is moved to a new history file and a suffix with the iteration number is attached to its name. The new backup file is created. This way, an unlimited number of the history backup files is being created on a disk. When you limit the number of history files (e.g. to prevent the disk capacity overflow), each time the scheduler replaces the latest file with the new one, it also renames all files accordingly. As a result, the file names and their number on a disk do not change.
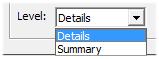
Figure 801.
The amount of information to be written to the backup log file is determined by the Level choice. The Details option records changes of all files of a database compared to the previous backup. If you choose to record the Summary only, the possible critical errors and backup process results are included in the log file.