
Use-case:
Enhancing the low signal of your sample and thereby saving the sample from light toxicity and prolong viability of your sample.
Advantages:
Significantly less exposure needed to acquire an image good for analyzing.
Less bleaching.
Low light toxicity.
Longer cell viability.
Enhance.ai is trained using the  NIS.ai > Train Enhance.ai window and executed using the NIS.ai > Enhance.ai window.
Enhance.ai is a module based on deep learning technology. It utilizes deep convolutional neural networks to enhance quality of captured images. Since the end of year 2012, deep learning based approaches have provided superior results on various image processing tasks, compared to traditional methods.
The module uses a supervised learning approach to enhance quality of captured images. Before training, user must acquire dataset that contains pairs of images captured with two different settings – low quality and high quality (ground truth). This is usually accomplished by capturing the same image with low exposure time and high exposure time. The network is then trained to transform the low quality image into high quality image.
Because users train their own networks, the reconstructed image is usually of higher quality compared to using pretrained networks or other methods of image processing. Enhance.ai is therefore a very flexible tool and can be used for any specific use case and any image modality, as long as high quality images for training can be acquired. Training itself is a very straightforward process and does not require any complex knowledge of math or neural networks. All parameters and hyperparameters of training are calculated automatically and without user interaction.
While training can be executed on a CPU, for efficiency reasons it is best to use an NVIDIA GPU card. Multiple GPU graphics cards are supported however it is recommended to use an even number of cards all of the same type. Training time varies on given use case and can be anything between 1/2 to 8 hours, depending on the difficulty of the dataset and the performance of the GPU card.
It is common knowledge that neural networks require thousands, if not millions of training samples. This is not the case with Enhance.ai, where special care was taken to alleviate this restriction. Most researchers do not have time to capture thousands of images to train the neural network. Enhance.ai therefore typically requires only about 20-100 images. Images should be acquired with same imaging conditions and on the same type of sample that will be used during the actual use of Enhance.ai in the experiments. It is best to acquire several multi-points from the sample, so that the dataset contains as much variability as possible. Finally, care should be taken so that the two channels (low and high quality) are mutually aligned and that there is no shift between channels.
Image augmentation is done automatically before training to expand the dataset and to train a more robust network. During training, sub-volumes of data are sampled from the training dataset and are fed into the neural network. The network extracts features from such images, processes them and finally attempts to reconstruct the ground truth image from the corresponding low quality image. It then compares the result and the corresponding ground truth image and updates its parameters accordingly. This process is iterative and over time, the network gets better and better at enhancing images.
After the network is trained, it can be used to enhance quality of other similar images, which can be acquired in low quality settings, therefore increasing the throughput of image acquisition and reducing phototoxicity on samples. Enhancing of samples, after the network is fully trained, is fast and is in order of seconds to minutes, depending on the dataset size and the performance of the GPU card.
Sometimes, more data might become available after the network has already been trained. In that case it is possible to retrain the network using this additional data. After that, the quality of resulting network will improve, enabling to use the network on more use-cases or in different imaging conditions.
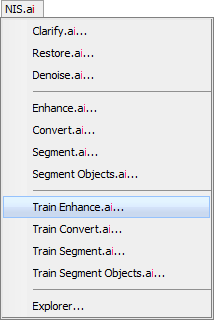
Figure 1473.
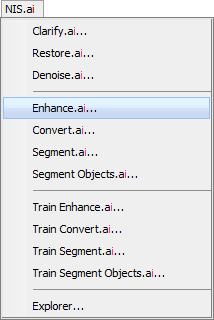
Figure 1474.
Acquire sample with two channels – low signal channel and high signal channel. Train AI to convert the low signal channel into high signal channel. Once the AI is trained, you no longer have to acquire the high signal channel, thereby preserving your sample from light toxicity.
To properly train Enhance.ai, perform the following steps:
Acquire sample with two channels – low signal channel and high signal channel. The ideal dataset should consist of the different multi-points representing all types of objects and structures.
The low signal channel should use the lowest possible light/acquisition time, while still containing enough relevant information.
The high signal channel should use the highest possible light/acquisition time and should contain all the details - this channel will be used as a ground truth image for AI to properly reconstruct the objects and the structures in the low signal channel.
Both channels must contain image of the same scene. It is the best to capture both channels in a single experiment e.g. by ND Acquisition (see the “ND Acquisition of Lambda channel setup image below”).
Open the sample image, containing both low signal channel and high signal channel.
Select the Train Enhance.ai (Functions) in NIS.ai menu. In the Train Enhance.ai dialog window you should:
In the Training data section select file(s) from your hard drive used for training by clicking on or .
Select the low signal channels as Source AI channels (e.g. channel TRITC-10ms).
Select the high signal channels as Ground truth channels (e.g. TRITC-Best).
Click to begin the training. Or you can click to run this training using the
NIS.ai > Explorer later.Wait for the training progress to automatically end when all iterations are done or wait until the curve seems to be constant and then click (see the image “Loss chart overview” below).
If the loss curve is not decreasing, try the following options:
Retrain the AI with a training dataset having a slightly higher signal.
Add multi-points to increase the variability of the training dataset.
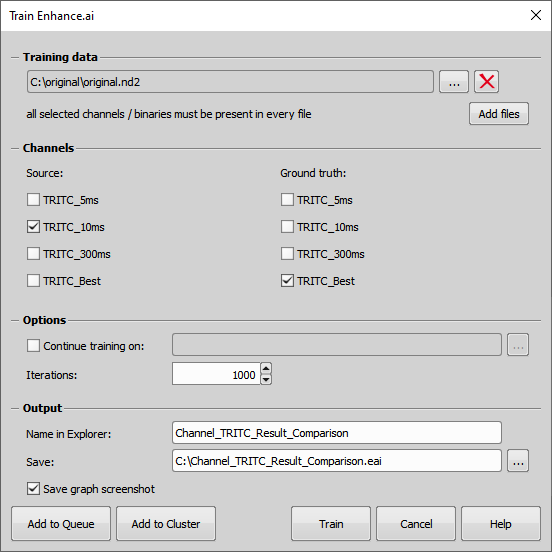
Figure 1475. Train Enhance.ai execution dialog and settings.
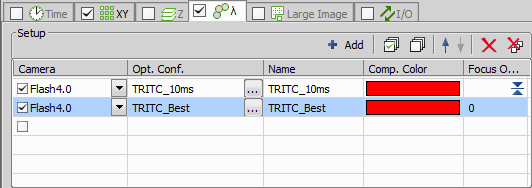
Figure 1476. ND Acquisition of Lambda channel setup.
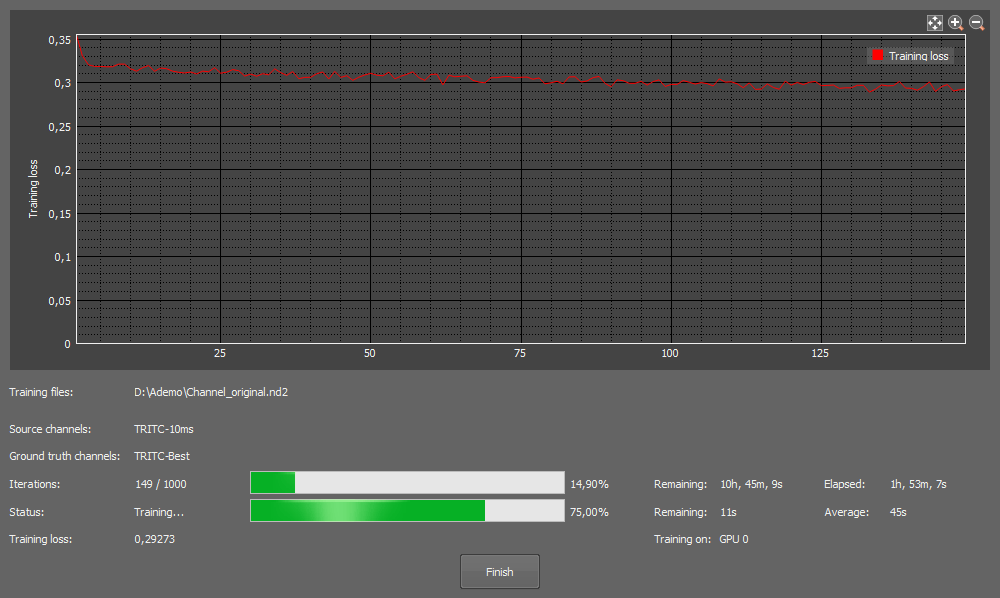
Figure 1477. Loss chart overview.
Loss curve (red) should be decreasing over time, faster in the beginning, slower in the end as it approaches zero. There may be a few bumps along the way which is correct. Training time depends on the difficulty of the sample and the use case. Enhance.ai tends to be faster, difficult DIC Segment.ai/Convert.ai are usually slower. To improve the training results, it is best to use multi-point image with higher variability, however more training images require more training time.
To test the trained AI:
Open the test low signal image (another but similar to training dataset).
Match the Document channels with the Source AI channels (e.g. TRITC-10ms) by connecting them.
Select the Trained AI with the network trained for the particular function from a file (From File) by clicking or pick it from the explorer (From Explorer).
Click to run the process.
After the progress is finished a new channel containing the result is created (see the resulting image below).
If the result is not satisfactory then try the following options:
Retrain the AI with a training dataset having a slightly higher signal.
Add multi-points to increase the variability of the training dataset.
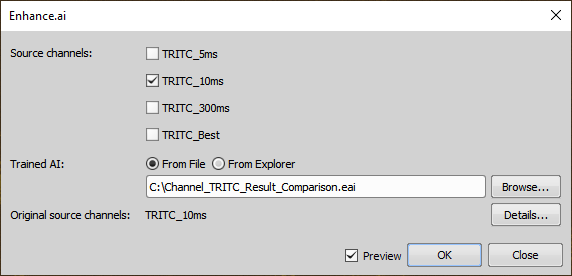
Figure 1478. Enhance.ai execution dialog.
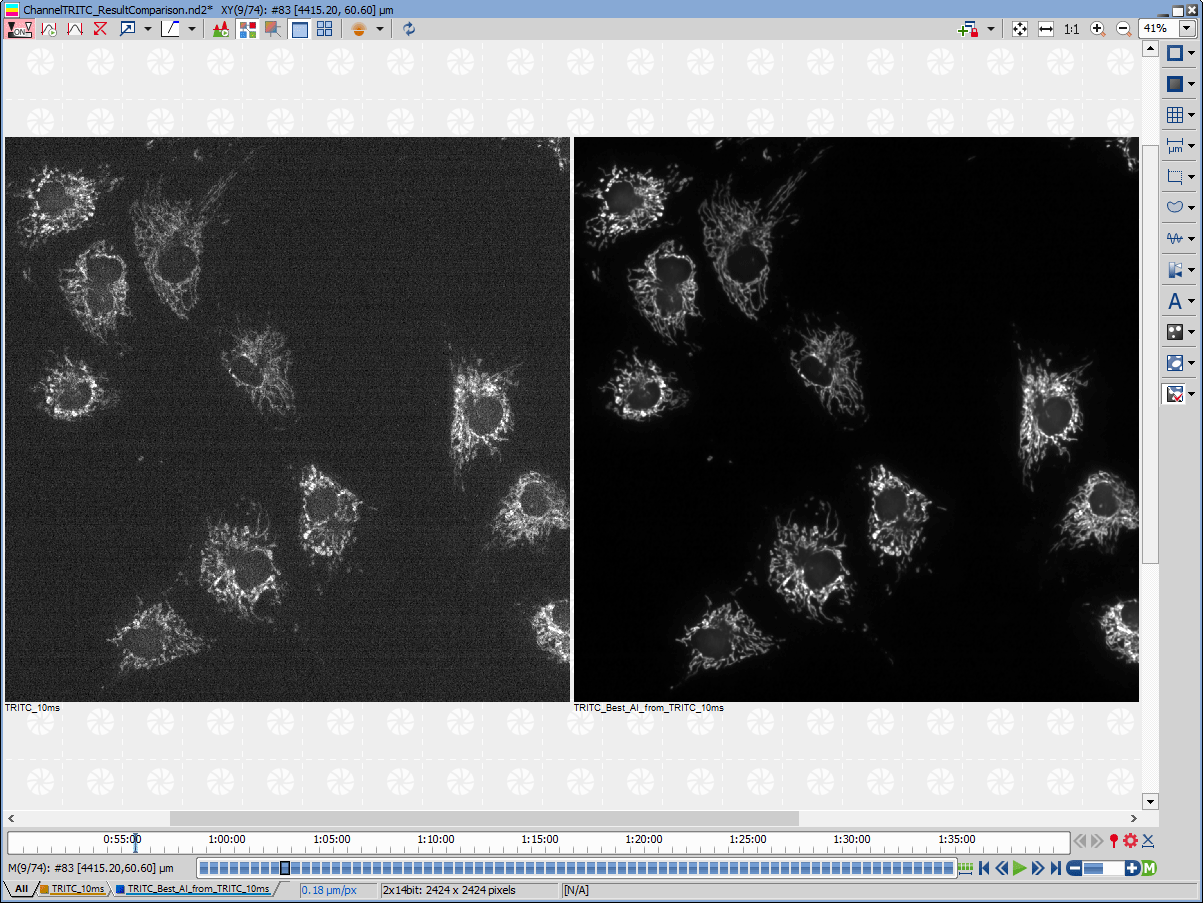
Figure 1479. The result of signal enhancement of TRITC by Enhance.ai. After the progress is finished the new channel containing the result is created.
To execute the trained AI, perform all steps from the testing trained AI:
The created AI can be applied on an infinite number of similar images acquired under the same conditions.