
Use-case:
Convert the modality from one to another. For example, generating nuclei from transmitted light channel (DIC, PhC, BF) or generating nuclei from one fluorescent channel to another fluorescent channel.
Advantages:
No need to acquire fluorescent image or acquire one fluorescent channel less.
No bleaching or less bleaching.
Very low light toxicity (by transmitted light only or higher wavelength fluorescent channel only).
Longer cell viability.
Convert.ai is trained using the  NIS.ai > Train Convert.ai window and executed using the NIS.ai > Convert.ai window.
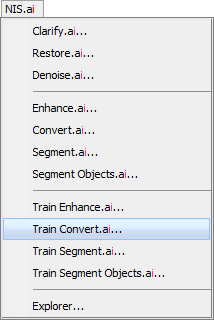
Figure 1480.
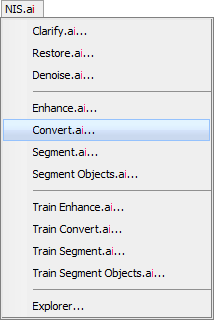
Figure 1481.
Acquire sample with two channels – the source modality channel and destination modality channel. Train AI to convert the source modality channel into destination modality channel. Once the AI is trained, you no longer have to acquire the destination modality channel.
For example, it is possible to train AI to transform the transmitted light channel into the DAPI channel to detect nuclei or to transform the FITC channel into the DAPI channel.
To properly train Convert.ai, perform the following steps:
Acquire sample with two channels – source modality channel and destination modality channel. Both channels should be acquired with sufficient light intensity and acquisition time to contain all relevant details and must contain image of the same scene. ND acquisition is the best solution (see the “ND Acquisition of Lambda channel setup image” below).
The source modality channel can be a transmitted light channel (e.g. DIC) and should contain enough relevant information.
The destination modality channel is usually a fluorescent channel (e.g. DAPI).
Open the sample image having both channels (DIC, DAPI).
Select Train Convert.ai in NIS.ai menu. In the Train Convert.ai dialog window you should:
In the Training data section select file(s) from your hard drive used for training by clicking on or .
Move the DAPI channel to the Convert to (ground truth) field.
Click to begin the training. Or you can click to run this training using the
NIS.ai > Explorer later.Wait for the training progress to automatically end when all iterations are done or wait until the curve seems to be constant and then click (see the image “Loss chart overview” below).
If the result is not satisfactory then try the following options:
Retrain the AI with a training dataset adding more multi-points to increase the variability of the training dataset.
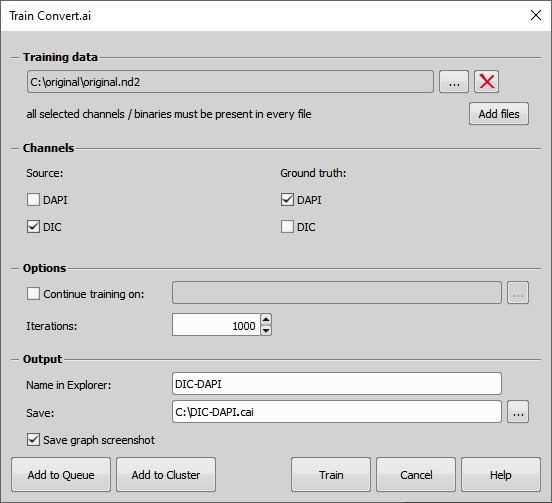
Figure 1482. Train Convert.ai execution dialog and settings.
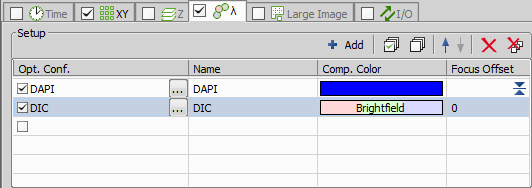
Figure 1483. ND Acquisition of Lambda channel setup.
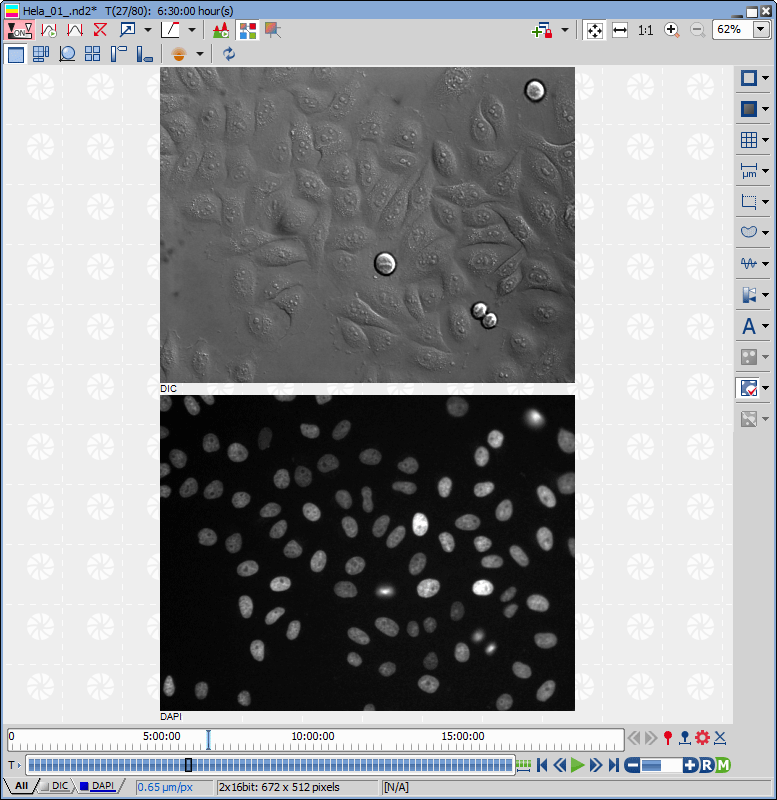
Figure 1484. Fig. 6 Acquisition of DAPI (Ground truth channel) and DIC (Source channel). [Courtesy of Nikon Imaging Center, RIES at Hokkaido University]
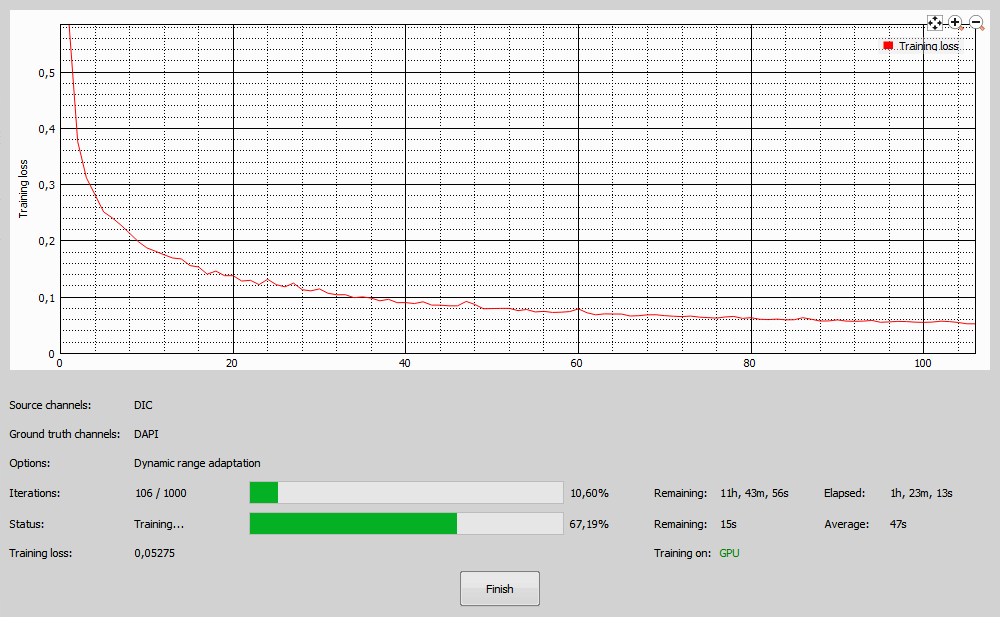
Figure 1485. Loss chart overview.
Loss curve (red) should be decreasing over time, faster in the beginning, slower in the end as it approaches zero. There may be a few bumps along the way which is correct. Training time depends on the difficulty of the sample and the use case. To improve the training results, it is best to use multi-point image with higher variability, however more training images require more training time.
To test the trained AI:
Open the test image only with DIC channel (another but similar to the training dataset).
Select Convert.ai in NIS.ai menu and run its execution dialog.
Match the Document channels with the Source AI channels (e.g. DIC) by connecting them.
Select the Trained AI with the network trained for the particular function from a file (From File) by clicking or pick it from the explorer (From Explorer).
Click to run the process.
After the progress is finished a new channel containing the result is created (see the resulting image below).
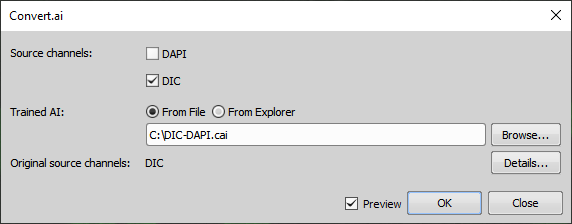
Figure 1486. Convert.ai execution dialog.
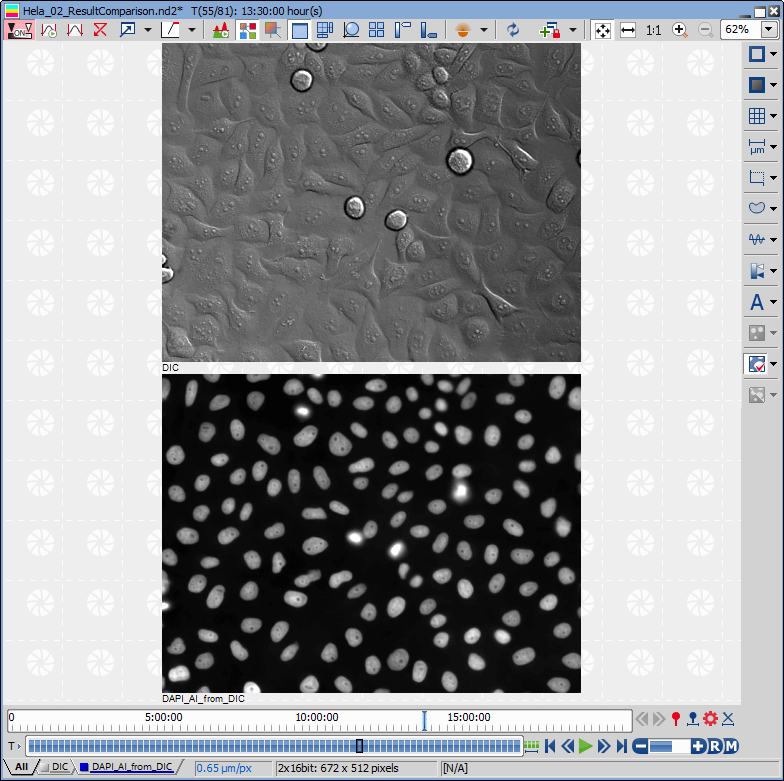
Figure 1487. Generating Nuclei from DIC by Convert.ai. [Courtesy of Nikon Imaging Center, RIES at Hokkaido University]
Nuclei were generated from trained AI, which converted DIC channel into the DAPI channel. No need to acquire DAPI channel, only DIC channel is needed.
To execute the trained AI, perform all steps from the testing trained AI:
The created AI can be applied on an infinite number of similar images with acquired under the same conditions.