
Open your image containing layers to be measured.
Calibrate your image (if not already calibrated) using
 Calibration > Recalibrate Document.
Run the
Applications > Layer Thickness Measurement > Measure Layers command.Define a layer using one of the drawing tools. Show Drawing displays a sample Calotest design which can help when defining the layers.
 3pts Circle
 Defines a circular layer by placing three points onto the perimeter of the layer.
 Circle
 Defines a circular layer by clicking into the center of the circular layer and then dragging the mouse outwards to define the perimeter while holding the primary mouse button down.
Check whether this layer will be measured (Measure checkbox).
Repeat steps 6-10 for all layers in your image.
Results of the measurement are displayed in the results table on the right. You can change the Units, export the results to a report (
 Report), to MS Excel (
  Export to Excel) or you can delete the defined binary layers after clicking
  Clear Data.
 Layer
Layer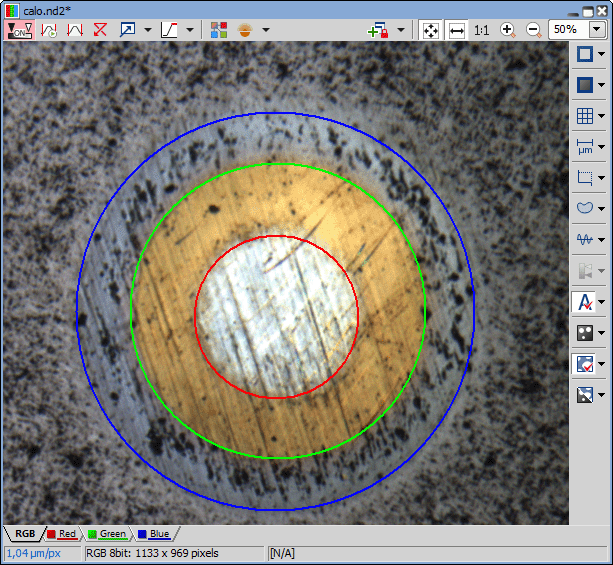
Figure 1337. Image window showing the Calo test layer measurement