
The first window of the grain size wizard ( ) contains the following options:
Planimetric, Linear, Circular, and Abrams measurement methods determine shape of the test mask. Each method has some default settings, which can be adjusted during the measurement.
The Comparison charts method lets the user to compare the sample images to standard comparison charts.
Select the source of your images. See the description in chapter Wizard Mode.
Specifies the size of a square for the Automatic Capture procedure. The specified number of fields are automatically arranged within this area.
Define number of fields sufficient for successful measurement. After the specified number of fields is measured, the user will be prompt to finish or to continue with the measurement .
(Automatic Capture only, requires a motorized Z drive) Select this option to perform auto focus according to the . The Steps in Range focusing method is used.
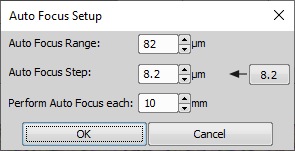
Figure 1409.
(requires: Extended Depth of Focus) (Automatic Capture only, requires a motorized Z drive) Select this option to use the Extended Depth of Focus capturing method where the resulting all-in-focus image is computed from a Z-stack. Set the range and step in the window.
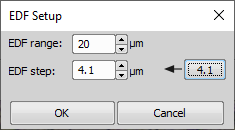
Figure 1410.
See Extended Depth of Focus for more information.
 ,
,  , ...
, ... (Automatic Capture only) Use these buttons to move the stage so that the red cross displayed in the live image is in the center of the measured area of the sample.
(Automatic Capture only) After clicking this button, the motorized stage moves to the bottom right corner of the sample. If the red cross in the live image is not where expected, you can adjust the Sample size. The stage will move accordingly.
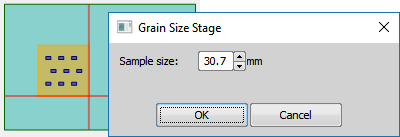
Figure 1411. Stage Area Preview
Proceeds to the next step of the wizard, which is grain detection. See Grain Size Wizard - Select Detection Preset.