Once the Cast Iron application is run, the Measurement tab appears in the right-side docking pane.
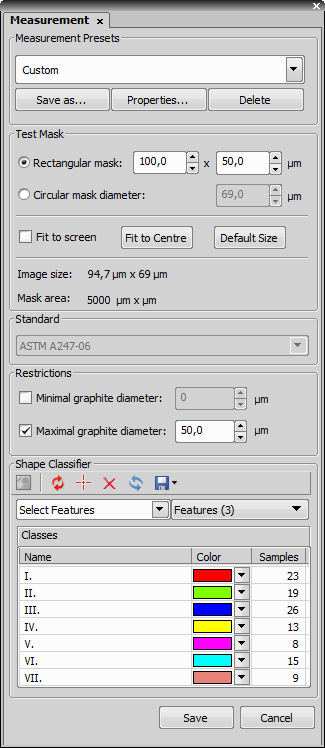
Figure 323.
Select the measurement method in Measurement Presets.
Adjust the Test Mask proportions and size.
Test Mask Options
Press the Show Mask button on the left toolbar to display the mask. The test mask dimensions can be modified either by inserting values inside the edit boxes, or by dragging the node points inside the picture by mouse.
Fit to screenCheck this box to maximize the test mask to the whole image area. Some edit boxes get disabled then.
Fit to CentrePress this button to move the whole test mask to the middle of the image area.
Default SizePress this button to reset the user settings and resize the test mask according to the standard.
Select the Standard according to how the results shall be treated.
Set Restrictions parameters to exclude objects of extreme values.
Class colors of the Shape Classifier can be modified.
Note
The classification rules can be modified using a training procedure. Click the Modify Classifier button, select a class, and pick typical objects from the image. However, the default classifier settings are based on the selected ISO/ASTM/JIS standard, so it is not recommended to modify them in any way.
Use the Save button to store changes of the current method, or use the Save As button to add the current settings as a new measurement preset, then press the Save button to store the setting.